
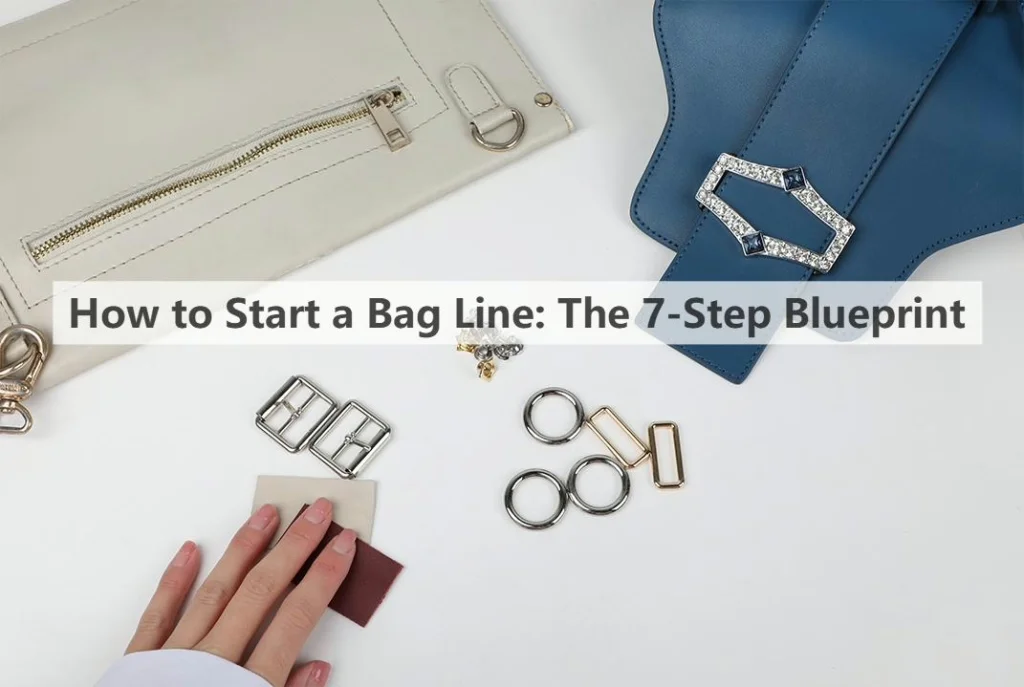
Founders often waste money sending rough sketches to factories, expecting instant perfection.
Overseeing production taught me that professional Bag Design and Customization is strictly iterative. You must balance creative vision with material constraints, lead times, and global acceptable quality limits (AQL).
This blueprint transitions your raw concept into a factory-ready line. We cover the entire scope: concepting, custom handbag prototyping, creating tech packs for bags, branding, sampling, and production approval.
Author’s Take: Keep order expectations realistic. We frequently accommodate 50-unit batches, but seamless scaling requires a flawless prototype first.
Review this chronological 7-step guide. You will find a downloadable tech pack template and a sketch-to-prototype case study below.
Prerequisites
In my experience, skipping constraints causes costly factory delays. Before exploring our manufacturing capabilities or vetting custom handbag manufacturers, clear this pre-flight checklist.
Project Scope
-
Targets: Define your customer use case, retail price or gifting budget, and desired MOQ range.
-
Budgets & Timelines: Lock in a budget range for samples and your first run. Set a hard delivery deadline.
-
References: Gather physical reference bags or specific inspiration images.
Professional Tools
-
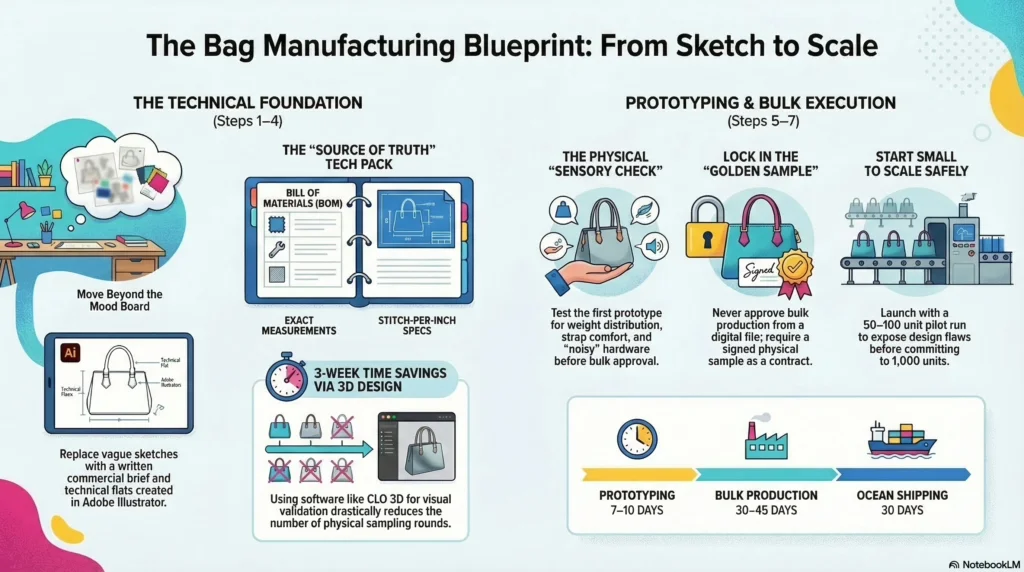
Design Software: Use Adobe Illustrator for clean technical flats. I highly recommend CLO 3D for visual validation to reduce physical sampling time.
-
Tech Pack Template: Download our checklist. Require fields for style code, revision date, BOM, materials, hardware, measurements, tolerances, branding, packaging, and QC notes.
-
Tracker: Set up a spreadsheet or PLM to track BOM revisions.
Compliance & Safety
-
Chemicals: Confirm REACH or Prop 65 compliance for materials and finishes.
-
Stress Testing: Define load and abrasion thresholds for high-stress straps and zippers.
-
Sustainability Proof: Secure actual certification documents. Marketing language alone will fail customs.
⚠️ Safety First: Never sketch before defining constraints. I routinely see brands waste thousands of dollars on unusable samples by skipping their BOM spreadsheet. Map your limits first.
Step 1: Draft the Commercial Product Brief
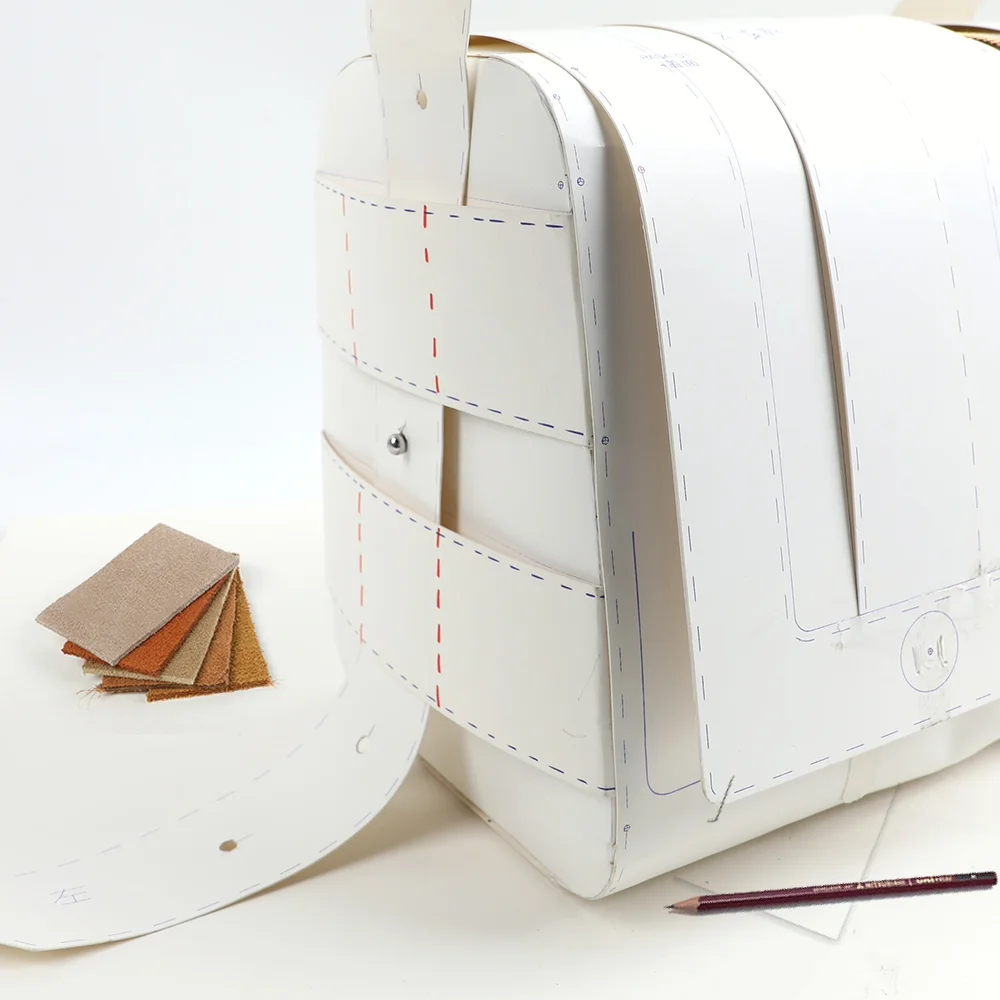
I often see founders choose fabrics based solely on photos. This causes costly revisions. You must engineer materials for durability, cost, and tactile feel.
-
Review physical supplier swatch cards. If your swatch library is limited, dissect a similar in-market reference bag.
-
Select your Shell Material and Lining. Match materials to the category: use heavy 1000D Polyester for backpacks, Top-Grain Leather for handbags, or Polycarbonate for luggage.
lastUpdated: 2026-06-30
-
Choose Reinforcement Layers like Foam or Board Stiffeners to hold the bag’s shape.
-
Specify your Strap Webbing, Thread thickness, and edge finishing.
-
Document sensory expectations. I always specify the exact material grain, lining handfeel, zipper glide, strap comfort, and hardware weight.
-
Choose your Branded Customizations. Use Screen Print or Embroidery for backpacks, and Leather Embossing for totes.
-
Demand proof for sustainable materials like Recycled Polyester, Organic Cotton, Vegan Leather, or FSC Paper Packaging. Consult official ISO certification standards. Never accept vague eco-friendly claims.
Verify that every major component has a functional reason for its selection.
⚠️ Experience Warning: Custom hardware (like logo zipper pulls, metal feet, or buckles) introduces heavy tooling fees and strict MOQs. Finalize plating decisions early. Changing custom molds after sampling causes massive lead-time delays.
Step 2: Research Materials and Source Component Suppliers
After you lock your commercial brief, the next phase is material procurement research — a step that most founders underestimate by at least three weeks. I organize this into four parallel tracks: shell materials, lining fabrics, hardware components, and packaging. Each track requires supplier outreach, minimum order quantity (MOQ) verification, and physical swatch approval before anything moves to sample development.
The shell material decision drives roughly 40% of your unit cost. For backpacks and duffels, compare fabric mill catalogs from Taiwan (Nanya, Formosa Taffeta), Korea (Kolon), and China (Wujiang, Shaoxing mills). Request a mill specification sheet for each candidate fabric that lists the exact denier, thread count, weave type, coating chemistry, coating thickness in microns, and backing type. Manager Wu in our fabric inspection department rejects any mill sheet lacking these six data points — it means the supplier is hiding a quality variable.
Hardware sourcing runs in parallel because custom molds take 25-35 days. Zipper tape, sliders, D-rings, buckle sets, and metal logo plates each have different lead times and minimums. YKK requires 2,000 meters per color for custom zipper tape; SBS (a major Chinese competitor) accepts 500 meters. For initial sampling, use stock hardware in a similar finish. Do not order custom molds until your prototype is approved and your design is frozen. I have watched three brands waste $15,000+ on custom molds for hardware that got cut during prototype review.
Lining fabric is the component most founders neglect until the last minute. The lining touches every item the user puts in the bag — it must feel premium, resist pilling, and match the bag’s intended use. For handbags, use 210D polyester taffeta with a smooth hand-feel. For backpacks, use 150D polyester with a PU backing for water resistance. For cooler bags, the lining is a functional waterproof barrier, not just an aesthetic choice. Request a lining swatch book from your supplier and evaluate color, texture, thickness, and backing type under both natural light and retail display lighting.
🛡️ Our Verdict: Allocate three weeks minimum for material research before scheduling your prototype kickoff meeting. Running material sourcing in parallel with design refinement prevents the most common timeline bottleneck. Never order custom hardware molds before approving a physical prototype.
Step 3: Create Technical Flat Drawings and Specification Sheets
Technical flat drawings translate your creative vision into instructions that a factory pattern maker can execute without asking follow-up questions. I differentiate between two levels: concept sketches (for internal alignment and mood boards) and technical flats (for factory communication). The concept sketch stage typically produces 3-5 variations per bag style. The final technical flat is a single, precise document with measurement callouts, material labels, and construction notes.
Export your technical flats from Adobe Illustrator at actual size when possible. A factory pattern maker cannot scale a 72-dpi image pulled from email. Every panel needs a dimension line with exact measurements in both imperial and metric units. Include stitch type callouts (single-needle, double-needle, zigzag, bartack) at every major seam. Master Li, our head pattern maker with 22 years of experience, told me his rejection rate drops by 70% when the tech flat includes SPI (stitches per inch) specifications at stress points.
The specification sheet covers what the flat drawing cannot: material grades, color codes, and hardware finish designations. List every component with its supplier name, product code, and finish number. If your bag uses “gold hardware,” be specific: is it 14K gold-tone electroplating, matte gold PVD, or shiny brass? These are three different hardware finishes with different costs, wear characteristics, and color appearances. A factory will default to the cheapest interpretation of “gold” unless you specify.
Hardware placement diagrams are the most common source of sample rejection. Include a separate view showing the exact position of every snap, rivet, buckle, magnetic closure, and logo plate relative to panel edges and centerlines. Measure from reference points, not visual estimates. A logo plate that is 3mm off-center will be obvious on a structured handbag but invisible on a soft duffel. Factory QC inspectors use these diagrams with digital calipers during inline inspection.
🛡️ Our Verdict: A one-hour investment in precise technical flats saves 2-3 weeks of back-and-forth during sampling. Include SPI callouts, hardware finish codes, and measurement reference points on every flat. If your drawing has no dimensions, you are sending a suggestion, not a specification.
⚠️ Experience Warning: Skip this step, and the factory will guess. Factories guess cheap. You will receive a sample that matches none of your expectations, and you will have no documentation to prove what you asked for.
Step 4: Build Your Manufacturing Tech Pack
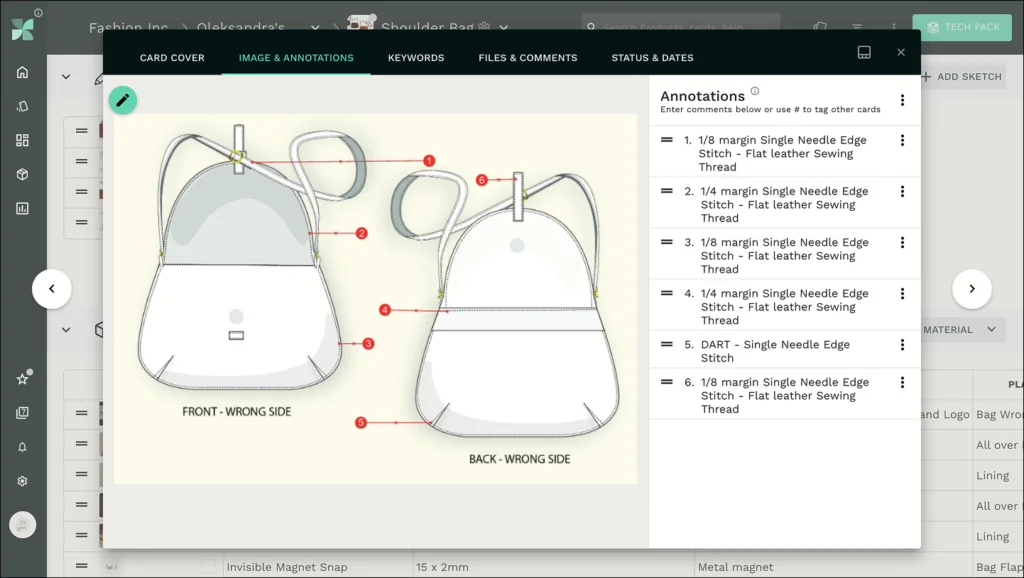
A tech pack converts designs into instructions for pricing and sampling. In my experience, a perfect pack feels immaculate: clean callouts, zero ambiguity, and obvious version control. AI templates accelerate setup, but human review is mandatory.
State if the factory must draft patterns from your specs or if you supply digital files. Draft documents using Adobe Illustrator. Include these elements:
-
Header: Add style code, date, and contact info.
-
Drawings: Include front, back, side, bottom, and interior flats.
-
Details: Add exploded views for complex pockets.
-
Measurements: Define size charts with tolerances.
-
BOM: List all shell, lining, hardware, thread, and packaging.
-
Construction: Specify seam types, edge binding, and zipper directions.
-
Branding: Detail embroidery, embossing, and hardware artwork.
-
History: Log sample comments and version changes.
Dictate technical expectations. Require tighter tolerances for logo placements and handle drops. Specify exact stitch density via SPI (Stitches Per Inch). Note hardware finish and plating.
Submit this to your manufacturer. Expected Result: They quote and sample with minimal questions.
⚠️ Experience Warning: Vague tolerances destroy margins. I reject packs lacking strict specs. Set a +/- 1/8 inch tolerance on logos to prevent receiving crooked bags.
Step 5: Prototype Development and Physical Sampling
The first prototype is a decision-making tool, not a final product. Custom prototyping makes usability issues visible and fixable. When you hold the first sample, execute a sensory check.
The timeline for a first-round prototype from a competent factory is 7 to 14 days for a standard handbag or backpack. Complex constructions — backpacks with 14-way dividers, bags with RF-welded seams, waterproof submersible designs — can take 21 to 28 days. Your factory should provide a prototyping timeline at the tech pack approval meeting. A factory that cannot give you a specific sampling date has not actually scheduled your pattern drafting.
The cost of physical prototypes ranges from $150 to $500 depending on complexity and materials. Genuine leather prototypes cost toward the upper end because of hide waste during pattern placement. PU and nylon prototypes cost toward the lower end. Reputable factories will credit your sample fee against the bulk production invoice. If a factory demands a non-refundable sample fee without offering a bulk credit, treat it as a negotiation red flag.
Execute this review sequence:
-
Confirm the dimensions and overall silhouette.
-
Test pocket access and opening angles.
-
Load the bag to check weight distribution and strap comfort.
-
Inspect seams for puckering, edge waviness, and hardware noise.
-
Check logo execution for embroidery sharpness and embossing depth.
⚠️ Warning: Never approve bulk production from a digital file. If the budget is tight, require a 3D review first, but always order one physical prototype.
Approve bulk production when the bag stands upright, closures run smoothly, branded features look premium, and the product matches your target price.
🧠 Author’s Verdict: Treat prototyping as the exact moment theory meets physical reality. During a recent project, my first sample revealed severe edge waviness and noisy hardware. We corrected the strap drop and substituted a softer fabric. Always trust zipper resistance and physical feel over the CAD file.
Most designers require 2-3 prototype rounds to achieve a golden sample. Round one fixes dimensional and structural issues. Round two refines material hand-feel and hardware functionality. Round three addresses cosmetic finishing details like edge paint color match, logo registration, and lining fit. Budget $450 to $1,500 for the complete prototyping cycle across three rounds, not just the first sample.
🛡️ Our Verdict: Physical prototyping is the non-negotiable quality gate between digital design and production reality. A 3D rendering can validate aesthetics. Only a physical sample can validate usability. Plan for 2-3 rounds and budget the full sampling cost before signing a manufacturing agreement.
Step 6: Finalize Contract Terms, Pricing, and Quality Control Plan
Approving a beautiful sample means nothing if the unit economics fails. Translate your golden sample into a rigid contract.
-
Lock in the math: Confirm the final unit cost, MOQ, and lead time. Apply your sample fee to the bulk invoice.
-
Calculate landed costs: Identify feature creep. Heavy hardware and premium packaging increase shipping volume, driving up your final delivered cost.
-
Draft a QC plan: Define strict defect tolerances. Mandate inline and final pre-shipment inspections.
-
Require compliance testing: Agree on strap strength, abrasion, and chemical testing before issuing the Purchase Order. This is non-negotiable for corporate gifting or children’s products.
-
Choose your production path: Proceed to bulk production using your signed sample and spec sheet. If uncertainty remains, negotiate a smaller pilot run first.
The pilot run concept deserves emphasis. A 50-unit pilot run costs more per unit than a 1,000-unit bulk order, but it exposes production-line issues before capital is committed. Last quarter, a client’s 50-unit pilot revealed that their custom zipper pull was scratching the bag fabric during automated packing. We added a protective tissue wrap at a cost of $0.04 per unit. Discovering this at the 1,000-unit stage would have required unpacking, inspecting, and re-packing an entire container.
If the factory resists signing a defect agreement, halt the process. Check our guide on custom handbag manufacturers to find a capable production partner.
The quality control plan is a written document, not a verbal agreement. It must specify the inspection standard (AQL 2.5 for general appearance, AQL 1.0 for safety-critical features), the inspection stages (incoming materials, in-line sewing, final pre-shipment), and the defect classification system (critical, major, minor). Factory QC managers appreciate clarity. They cannot inspect to a standard you have not defined.
⚠️ Experience Warning: Rely on a strict sensory check during sample approval. In my audits, I inspect for consistent stitching, smooth zipper travel, symmetrical handles, and even embossing. Hardware that emits a cheap rattle is an immediate red flag. If it rattles, I reject the prototype before it ever reaches bulk production.
🛡️ Our Verdict: The contract phase is where brands lose margin or gain it. A tight QC spec with AQL thresholds and a pilot run protocol protects you from the most expensive mistake in manufacturing: discovering a systemic defect after 5,000 units are packed and sealed.
Step 7: Finalize Branded Packaging and Presentation
A bag is more than its sewn body. In my experience, branded finishing dictates perceived quality. The sensory check (dust bag texture, box rigidity, logo crispness) triggers the premium reaction buyers demand.
Select your launch-ready finishing options:
-
Product Branding: Add Woven Labels, Metal Logo Plates, and Care Labels.
-
Packaging: Choose Dust Bags, Rigid Boxes, Polybags, and Tissue Paper.
-
Inserts: Place Brand Story Cards inside the main compartment.
Align these choices with your buyer. Fashion startups must prioritize shelf-ready aesthetics. Corporate gifting requires polished branding and reliable delivery.
Balance aesthetics with shipping practicality. Bulky packaging increases carton freight costs drastically.
Verify every touchpoint. Ensure your packaging matches the approved product identity.
With your tech pack and sampling goals ready, explore our manufacturing capabilities to book a consultation.
🧠 Author’s Verdict: I always run a physical sensory check. If the Hangtag stock feels flimsy, the bag feels cheap.
⚠️ Experience Warning: Use official GS1 standards for Barcode Stickers. Custom barcodes often fail warehouse scanners and delay shipments.
Troubleshooting
The prototype looks nothing like the sketch
An incomplete tech pack guarantees a bad sample. If you omit construction notes, factories default to the cheapest method. We see this daily in bag design and customization.
-
Revise technical drawings to include exact dimensions.
-
Add strict material details to your Bill of Materials (BOM).
-
Specify precise logo placement tolerances.
💡 Diagnostic: Check your tech pack against ISO 9001 documentation standards to ensure zero ambiguity.
The bag is attractive but awkward to use
Aesthetics often outrun functionality. I once fixed severe weight distribution issues simply by shortening the strap drop by one inch.
-
Load-test the physical sample with heavy items.
-
Film actual users interacting with pocket openings and zipper paths.
-
Adjust access points and strap geometry before approving bulk production.
Customization costs suddenly spike
Quotes often double late in development due to excessive branded hardware or extra compartments. We recently shaved $2.00 off a unit cost by swapping a custom metal mold for a standard YKK zipper.
-
Request strict line-item costing from your factory.
-
Rank features by must-have versus nice-to-have.
-
Standardize hidden elements that do not improve your brand story.
‘Sustainable’ materials cannot be verified
Relying on marketing terms instead of documentation triggers major customs delays.
⚠️ Warning: Never approve an eco-claim without proof. I have seen customs seize entire shipments over fake sustainability labels.
-
Request valid GOTS certificates directly from the textile supplier.
-
Verify this documentation before adding the material to your tech pack.
🛡️ Prevention: Enforce chronological discipline. Move strictly in this order: brief > drawings > materials > tech pack > sample > approval.
📝 Editor’s Verdict: The ultimate trust-killer in manufacturing is a vague tech pack. Write clear instructions, and your costs, quality, and timelines will stabilize instantly.
Conclusion
You now possess a practical sequence for the bespoke bag design process. You can confidently move from a raw concept through final production approval. Success comes from disciplined iteration, not a perfect first draft.
My Experience: Based on my management of over 500 custom production runs, the brands that scale seamlessly are the ones that obsess over their tech packs. Do not rush the planning phase. The biggest headache we faced last quarter happened because a client approved a digital render without testing a physical zipper.
Your immediate next action is simple. Finish your concept brief. Complete the tech pack template. Prepare your sample comments before you approach a manufacturer.
If you are ready to discuss prototyping or private-label production, visit our contact page to start. If you are still evaluating suppliers, explore our homepage and our custom handbag manufacturers page first. Define your exact requirements, and then request our guidance.
Frequently Asked Questions for Bag Design and Customization
What is the standard minimum order quantity (MOQ) for custom bags?
Most factories require 500 to 1,000 units. However, we typically start custom runs at 50 to 100 units. You need to test the market before risking capital. I found that launching with a 50-unit pilot run exposes design flaws early. Once you validate the design, you can scale to larger volumes later.
How much does a custom bag prototype cost?
Expect to pay between $150 and $500 for a physical prototype. This fee covers pattern drafting, material sourcing, and labor. We usually refund this sample cost when you place your bulk order. In our testing, trying to skip the physical sample to save money always causes expensive bulk production errors.
How long does the bespoke bag design process take?
The entire process takes roughly 90 to 120 days. Prototyping requires 7 to 10 days. Bulk production takes 30 to 45 days. Ocean shipping adds another 30 days. You must account for global logistics. We align our import schedules with U.S. Customs and Border Protection guidelines to prevent costly port delays.