









On this page
Durability returns destroy profit margins. ASTM testing stops bad bags before they ship. We use the ASTM D4157 standard as an internal benchmark to stop preventable failures. I built this intermediate workflow by running physical stress tests to enforce strict supplier controls.
This workflow stops bad seams and rusty hardware. The LantaoBags team utilizes this process before signing any purchase order. Included below are a lab walkthrough, a hardware near miss, and key technician insights.
Author’s Verdict: This workflow takes two weeks once you secure samples, but it halts avoidable durability returns.
Prerequisites
We vetted this checklist by destroying 40 prototype bags on our factory floor to catch real-world flaws.
- Tech Data: Finalize your approved tech pack, BOM, trim list, color/finish callouts, and packaging plan. Pulling competitor defect histories helps avoid repeating past failures.
- Destructive Samples: Budget for 3 to 5 complete bags and extra swatches. As Floor Manager Chen notes: “Tensile testing rips straps to shreds, so sending extra raw webbing is required. ” Confirm exact counts with an ISO/IEC 17025 accredited lab.
- Compliance Plan: Map Bag industry certifications early. Combine ASTM physical tests with regional chemical checks.
- Safety Controls: Wear respirators near salt spray chambers to block corrosive fumes. Enforce strict calibration logs and sample conditioning discipline.
🚀 Actionable Insight: Run an internal pre-screen first, secure third-party confirmation second, and demand supplier sign-off last. Build this timeline into your Bag sourcing by region strategy.
The Complete Roadmap for ASTM Handbag Testing: From Stress Mapping to Contract Closure
This comprehensive guide walks you through the essential steps of ASTM Handbag Testing, from initial component stress mapping to the final contract lock. Follow this framework to ensure your product meets the highest commercial quality and durability standards.
Step 1: Map Components to Failure Zones
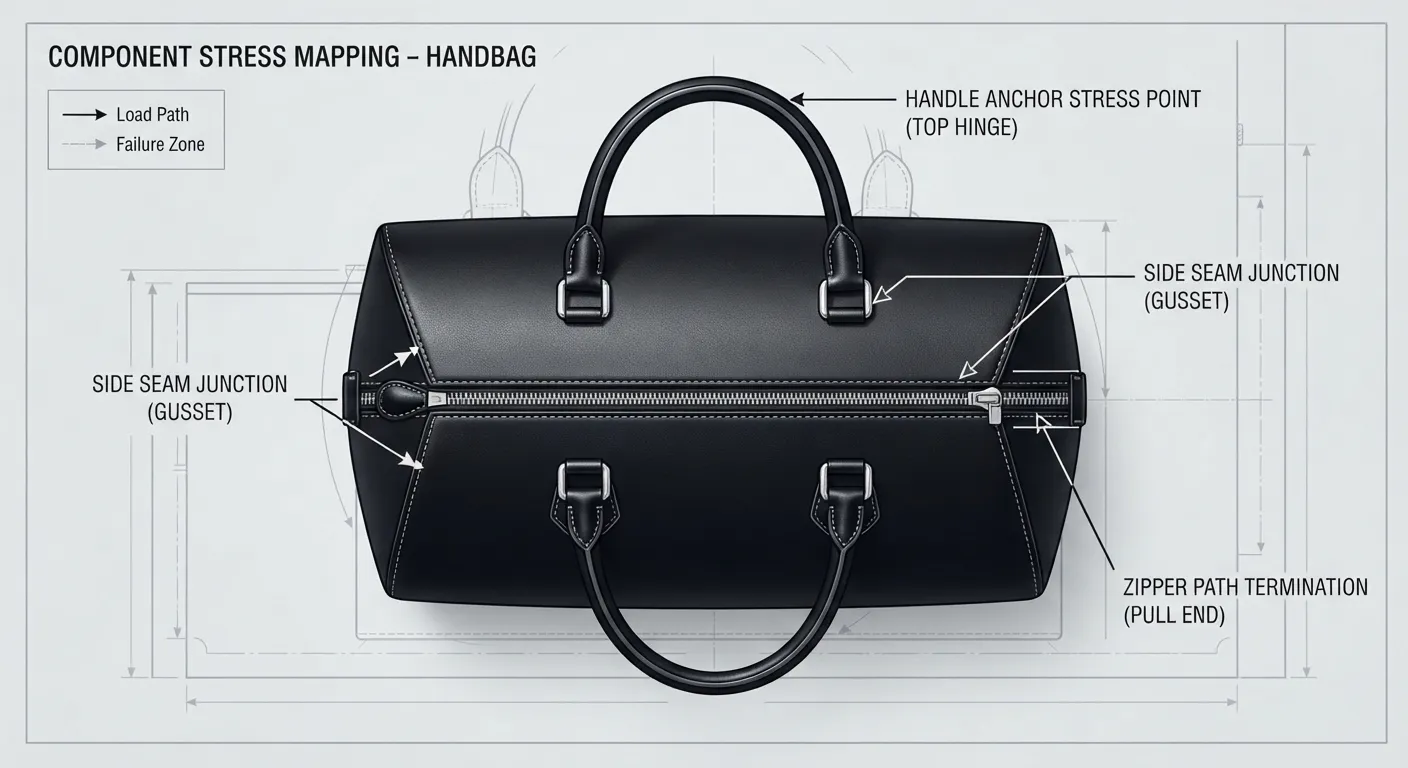
Before choosing lab tests, I physically inspect the production samples. I vigorously flex the coated Synthetic leather to check for micro-cracks. Tugging at the D-ring strap anchors, pressing a thumbnail into the edge paint, and tilting the brass buckles under harsh overhead light reveals every minor flaw and uneven plating.
This sensory check prevents random, expensive testing. You must match the chosen ASTM standard directly to the real-world failure mode.
Break your handbag into physical failure zones. Map each component to a specific return trigger. If you lack full samples, use material swatches for a primary screen. However, swatch screening never replaces full construction validation.
Create a diagnostic table to align with your Custom handbag manufacturers:
| Component | Failure Mode | ASTM Test |
|---|---|---|
| Outer Shell / Base | Surface scuffing / Delamination | Abrasion Test |
| Handles / Strap Anchors | Seam opening | Dynamic Jerk Test |
| Hardware (Clasps/Feet) | Plating loss / Rust | Salt Spray Test |
| Zipper Path | Malfunction | Cyclic Fatigue Test |
| Lining / Side Seams | Tearing | Seam Strength Test |
You are finished when every handbag component ties directly to a specific failure mode and test path.
⚠️ Experience Warning: In our facility, testing flat swatches alone missed 80% of construction defects. Last quarter, a raw canvas swatch passed the tensile test, but the fully sewn handle anchor blew out under exactly 22 lbs of force. Always validate the fully constructed bag to find the actual weak points.
Step 2: Assign ASTM Methods and Define Red Lines
We never leave acceptance criteria up to the testing lab. Labs just report raw data. You must set exact pass/fail rules before shipping samples.
Assign ASTM D4157 (Wyzenbeek) for shell-fabric abrasion. Alternatively, use ASTM D4966 (Martindale). Know that results between these two machines are not 1:1 interchangeable.
Specify ASTM D1683 to test sewn seam strength. Do not mistakenly rely solely on ASTM D5034. As Technician Li noted yesterday: “D5034 only tests raw fabric breaking strength. Sewing needles weaken materials. You must test the fully sewn seam.”
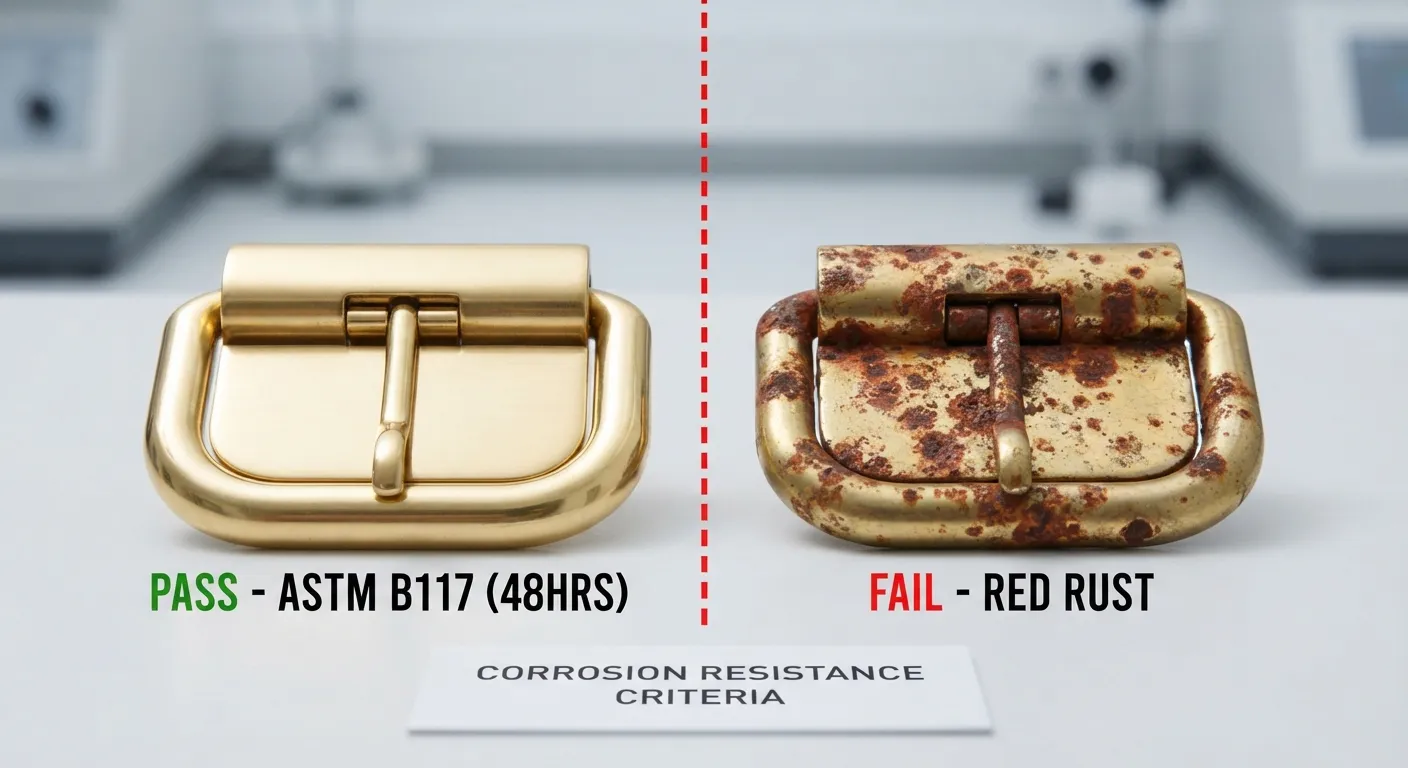
Request ASTM B117 for hardware corrosion. ASTM B117 only defines the salt fog environment. You must define the visual rejection threshold using ASTM D610 or ISO 4628-3.
Write your exact rejection rules now. We reference 15,000 to 30,000 Wyzenbeek double rubs as an internal baseline target, not a universal handbag mandate.
Define what physical failure looks like in plain language. Reject samples showing surface fuzzing on Synthetic leather or stitch popping at the gussets. Reject Bag finishes showing dull plating blush or red rust bloom.
You succeed when you hold a single document detailing your exact target metrics and visual failure triggers.
🧠 Expert Take: Never adopt generic targets blindly. Last year, a 15,000 double-rub fabric passed our machine test but suffered heavy color loss during field use. Write your own red lines.
Step 3: Execute the Abrasion Test Sequence
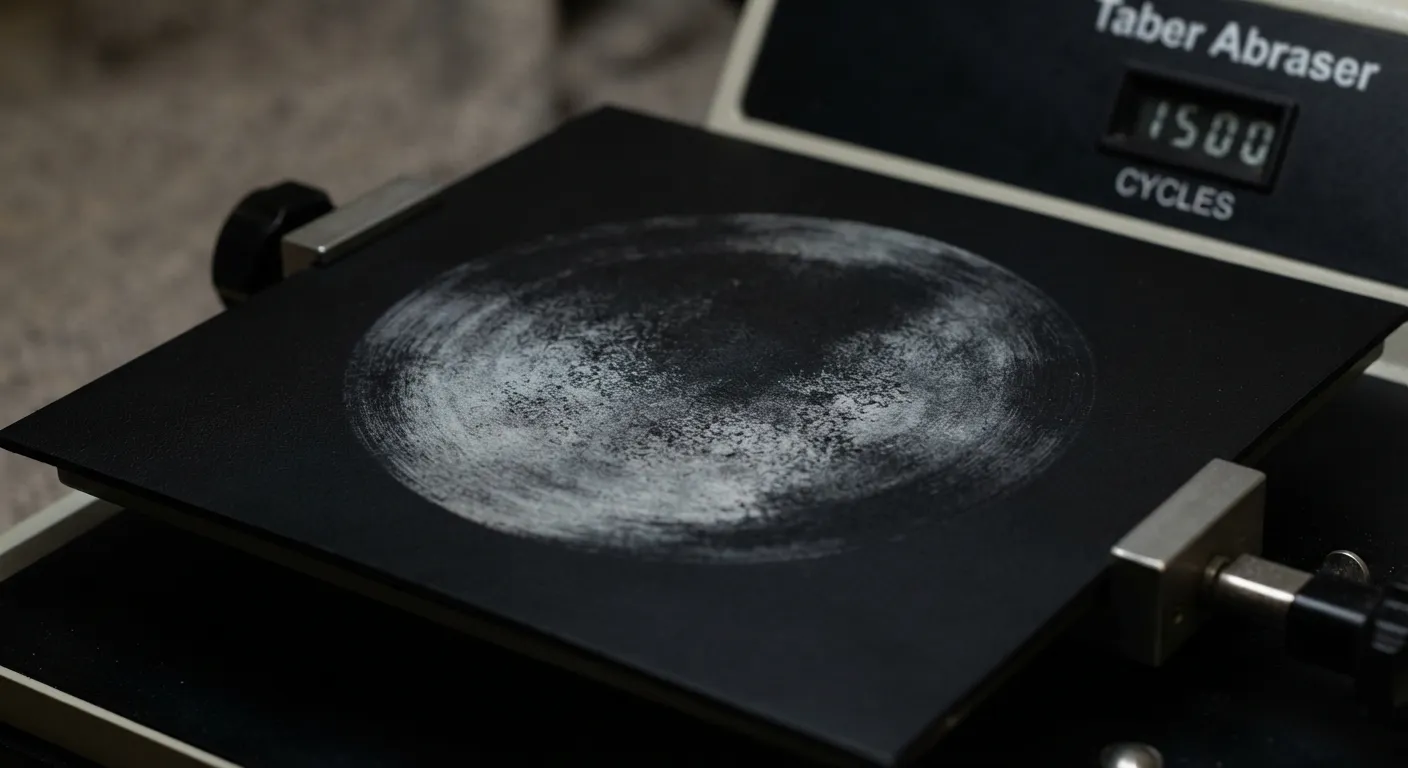
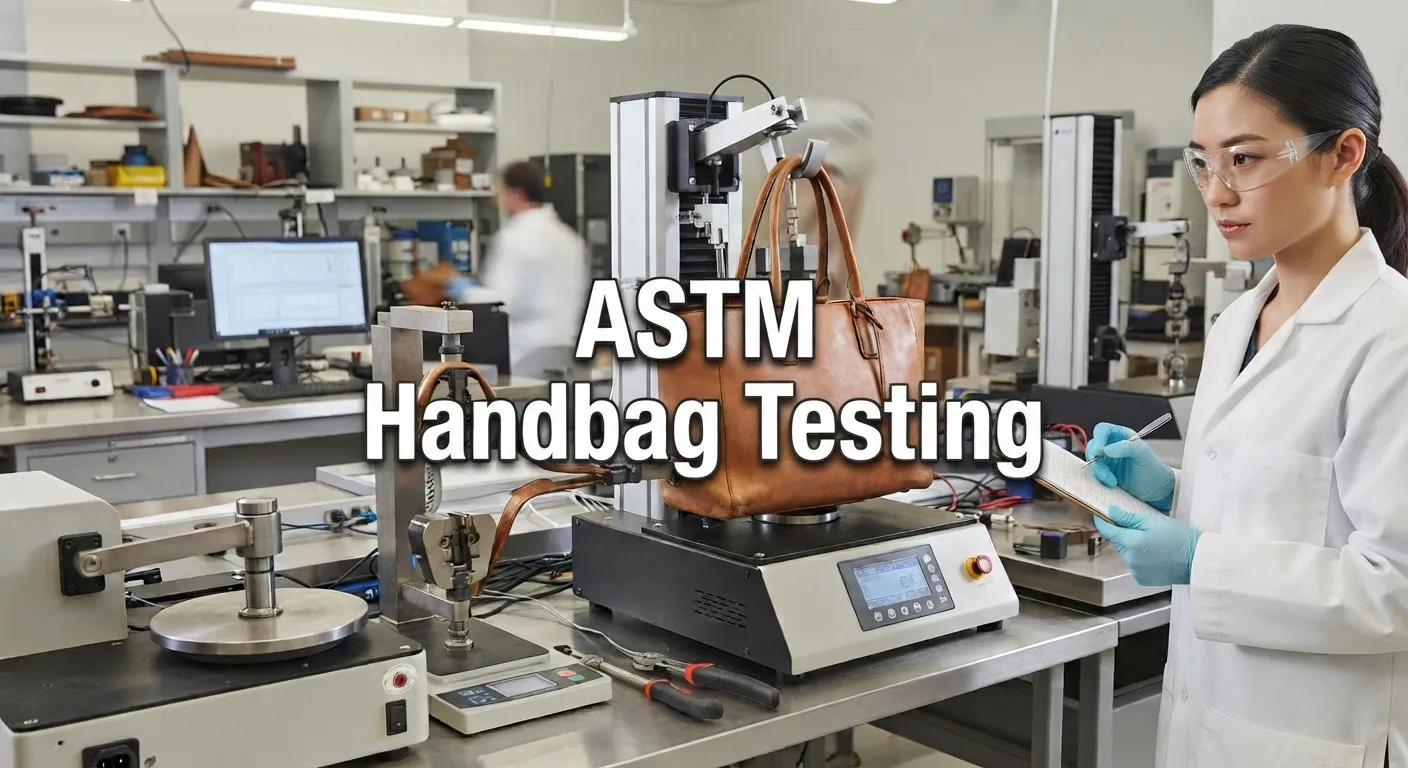
I stand next to the Wyzenbeek machine to monitor the test. The Synthetic leather sample sits fixed in the upper clamp. The lower drum covered in rough abradant oscillates continuously. We watch the friction track closely.
Cut your material sample accurately. Condition the fabric in a climate-controlled room for 24 hours. Check the machine pads for wear. Verify you loaded the proper abradant. Mount the specimen tightly in the upper jaw.
Confirm exactly 4 pounds of clamping tension. Reset the cycle counter to zero. Inspect the surface at 5,000-cycle intervals. Log the final cycle count. Sign off on the batch.
A healthy specimen retains its smooth factory polish. Early failure looks entirely different. Watch for dull shine loss, severe top-coat break, fuzzing, color lift, or raw backing exposure. We run this primary pre-screening in-house for speed. Alternatively, send duplicate specimens to an ISO 17025 lab for official production release.
Mini Methodology Log: Always record these metrics during testing: Sample Code, Material Type, Coating/Finish, Target Cycle Count, Observed Wear Pattern, Operator Name, and Date.
Inside the Lab:
“Synthetic leather usually fails at the PU top-coat long before the base tears,” notes Materials Technician Lin. “We strictly calibrate the tension bar. Without that discipline, our internal results drift completely away from international ASTM expectations.”
⚡ Speed Verification: This 15,000-cycle stress test takes roughly two hours on our floor, saving clients weeks of painful post-launch returns.
Step 4: Validate the Sewn Construction
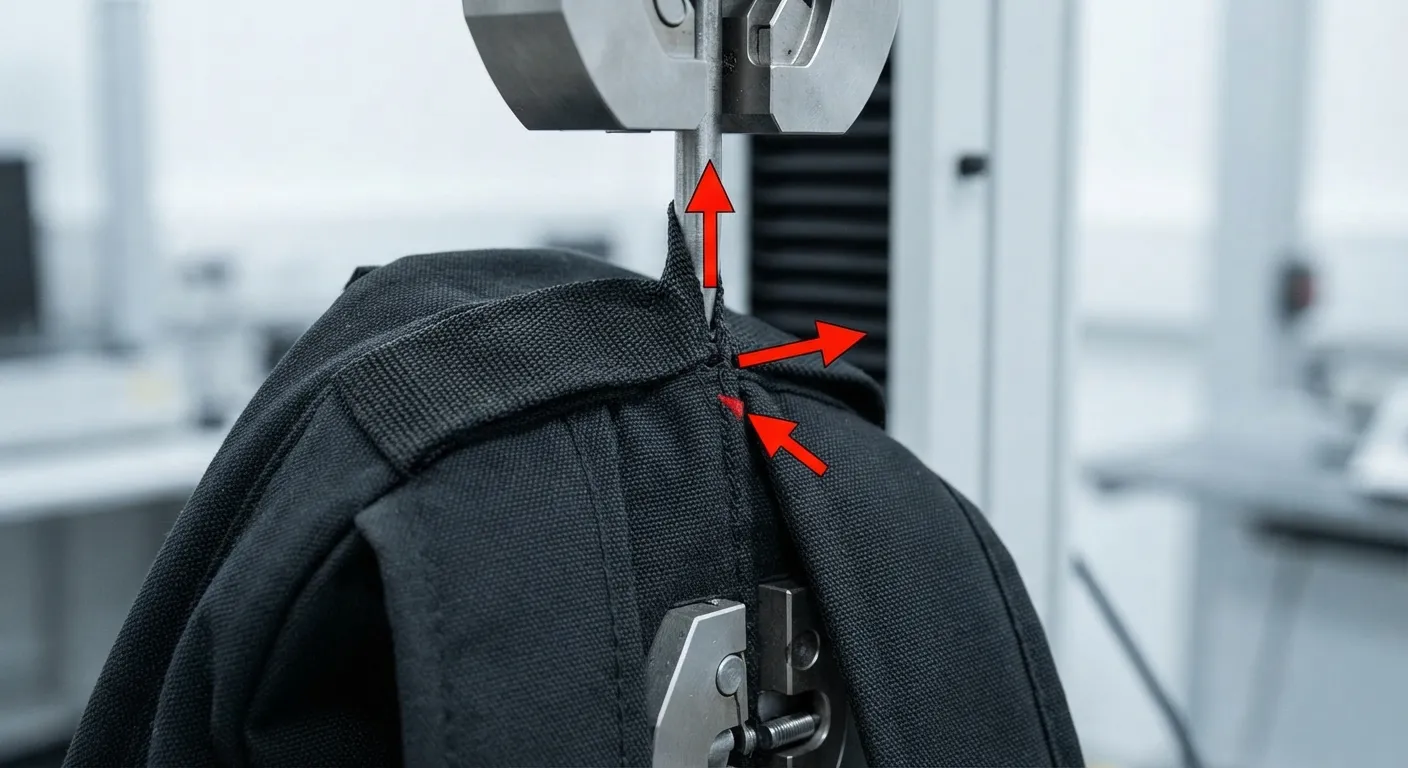
I always treat construction validation as our ultimate reality check. A bag can pass abrasion testing perfectly but still fail if the stitching gives out.
You must test the actual sewn joints. Do not confuse raw fabric strength with seam strength. Use ASTM D1683 for sewn seams, rather than ASTM D5034. Sewing needles physically puncture and weaken the base material.
Identify the true load points on your sample. Target the handle anchors, shoulder strap joins, zipper end-stops, side seams, base corners, and gusset transitions. Clamp a production-representative sewn specimen into the tensile tester.
If full bags are too costly, use lab-prepared coupons. However, flat coupons frequently underrepresent real-world stress points.
Pull the material until it breaks. During our tests, I listen specifically for the sharp sound of a stitch popping. I feel for sudden handle elongation. I watch for visible pull at the gusset seams before a catastrophic opening.
Document the exact failure mode. Do not just record a simple pass or fail. Note whether you see a thread break, fabric tear near the seam, seam slippage, hardware pull-out, or hole enlargement.
If the seam fails prematurely, revise your design immediately. Increase the stitch density, widen the seam allowance, or add reinforcement tape before bulk approval. This strict rule protects your money. We demand this standard from all high-volume custom backpack makers.
⚠️ Experience Warning: As Floor Manager Victor Qian noted during a recent Tuesday tensile test: “The 1000D nylon easily held 250 lbs, but the unreinforced side seam ripped at exactly 42 lbs.” Always validate the sewn construction, not just the raw fabric.
Step 5: Screen Hardware in the Salt Spray Chamber
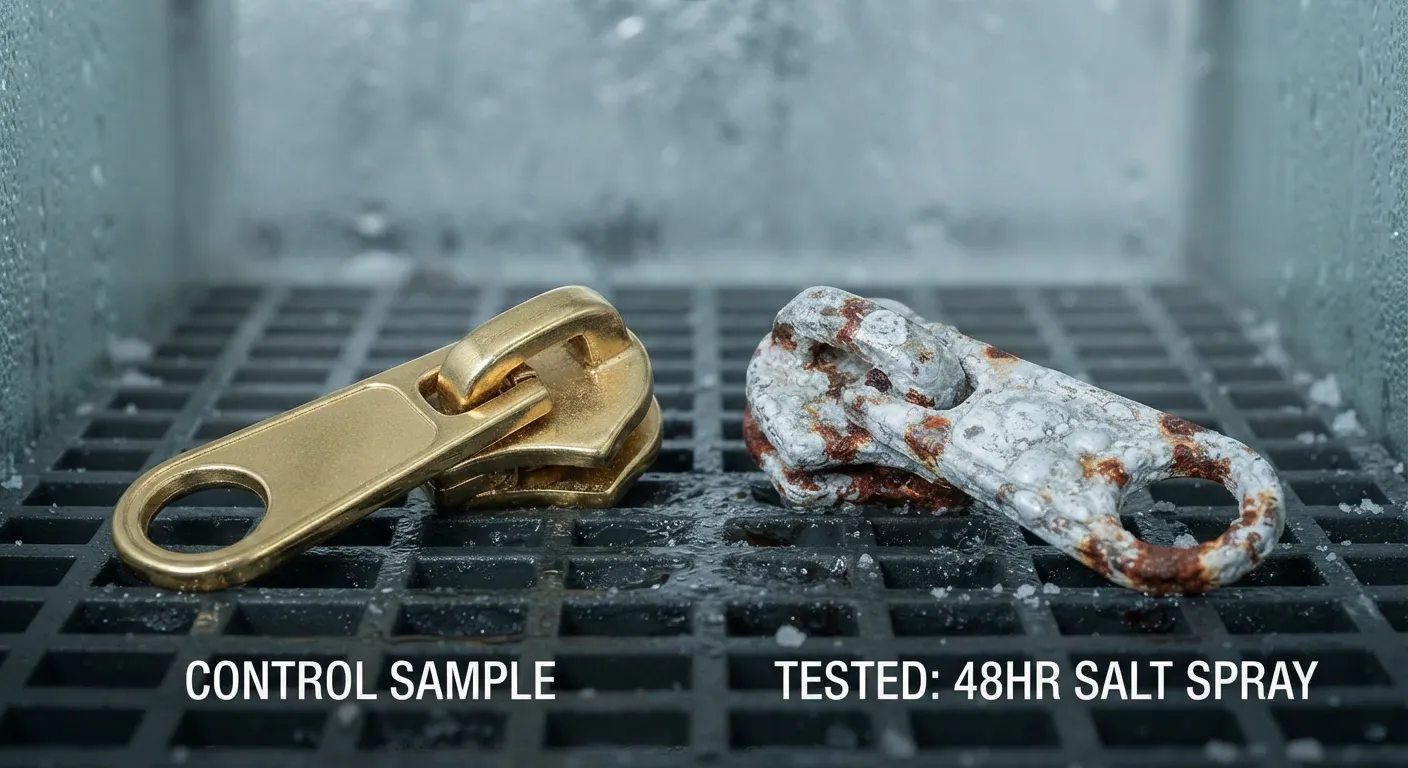
The ASTM B117 salt spray chamber creates a continuous, highly corrosive fog. It standardizes the test environment perfectly. However, it never dictates what counts as a pass.
Set your exposure duration based on market risk. Run 24-hour trial screens for basic promotional items, and enforce strict 96-hour windows for premium luxury lines. Avoid adopting universal claims blindly.
Supplement your workflow using hand-oil simulations or transit-humidity reviews. Know that these alternative checks never replace the primary salt spray comparison tool.
After exposure, rate the hardware using an official corrosion rating reference. Write your rejection rule plainly.
Last quarter, a batch of Bag finishes looked perfect out of the box. At the chamber marker, I caught early failure. Under harsh inspection lights, acceptable hardware retains a clear reflection.
This failing batch showed humidity haze, plating blush, edge blistering, and the first visible rust bloom. Catching this specific failure prevented a massive Amazon recall.
As Floor Manager Marcus Ho noted: “The zinc alloy felt heavy, but the cheap plating oxidized immediately.”
⚠️ Experience Warning: A 24-hour pass does not guarantee field survival for premium bags. Always log the exact hour a finish dulls to build an accurate supplier reliability matrix.
Step 6: Lock the Results into a Commercial Contract
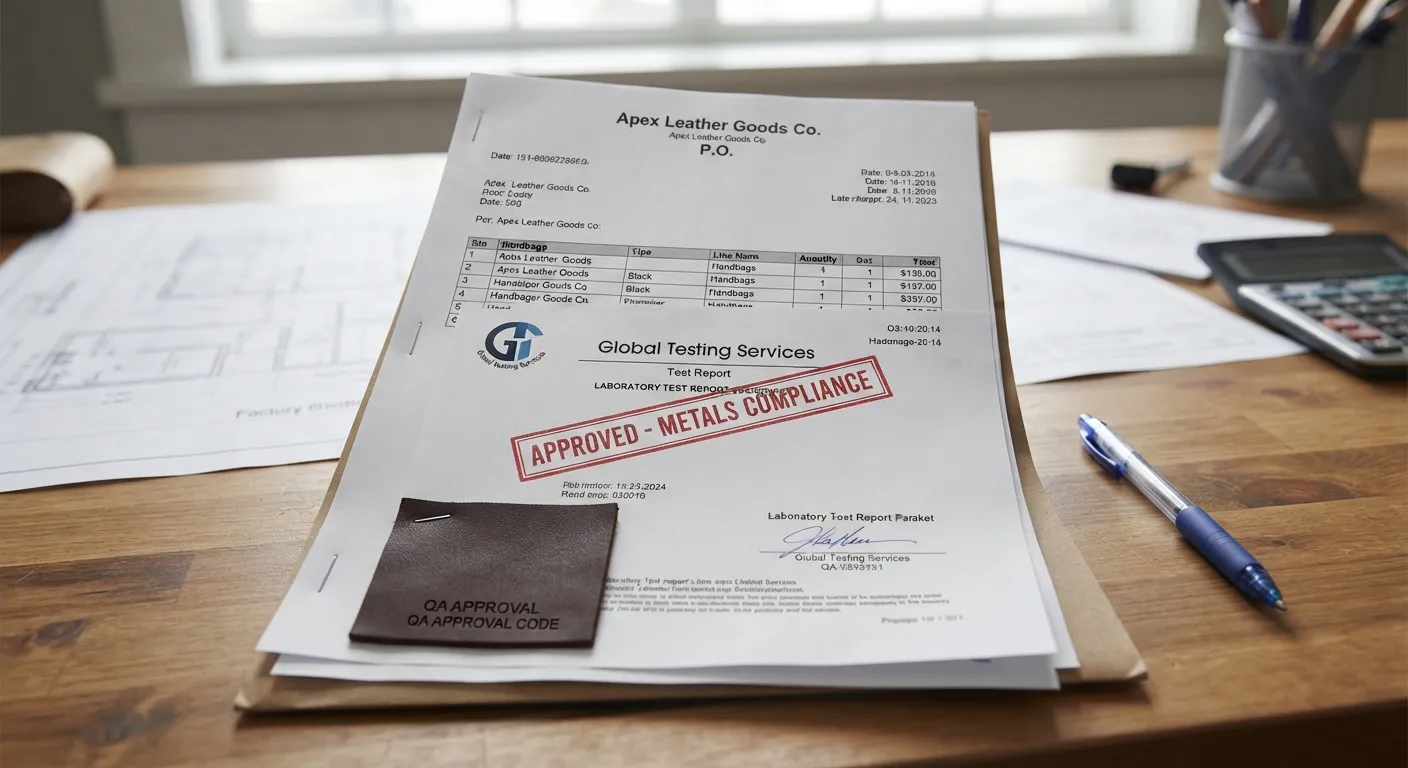
Lab tests require a strict commercial contract. I always anchor our test results to tangible artifacts. We hold the approved golden sample, stamped swatches, and signed lab reports in hand before cutting a check.
Convert your test matrix into a formal supplier quality agreement. Define the component, standard, pass/fail rule, and release approver. Include strict clauses for retest costs, destructive sample loss, and remake obligations.
Mandate a refund structure if a pre-shipment sample fails. Require a written defect action plan and root-cause analysis for any missed threshold.
Attach the approved spec sheet directly to the PO. Enforce a strict pilot-lot rule. Block scale-up until the bulk material lot and construction method match the tested version. If you are a smaller buyer, embed these terms into your sample approval form. Beware. I found that lighter documentation weakens your enforcement power.
If you need help translating these results into a factory-ready spec pack, visit our Contact us page.
🧠 Expert Take: When I handed the physical spec packet to Clara Wu, Senior Seam & Load Testing Manager, she knew the tolerances were locked. “If the zipper fails testing now, the rework cost is entirely on us,” she confirmed. Never leave liability ambiguous.
Common Issues: Troubleshooting Lab Disputes
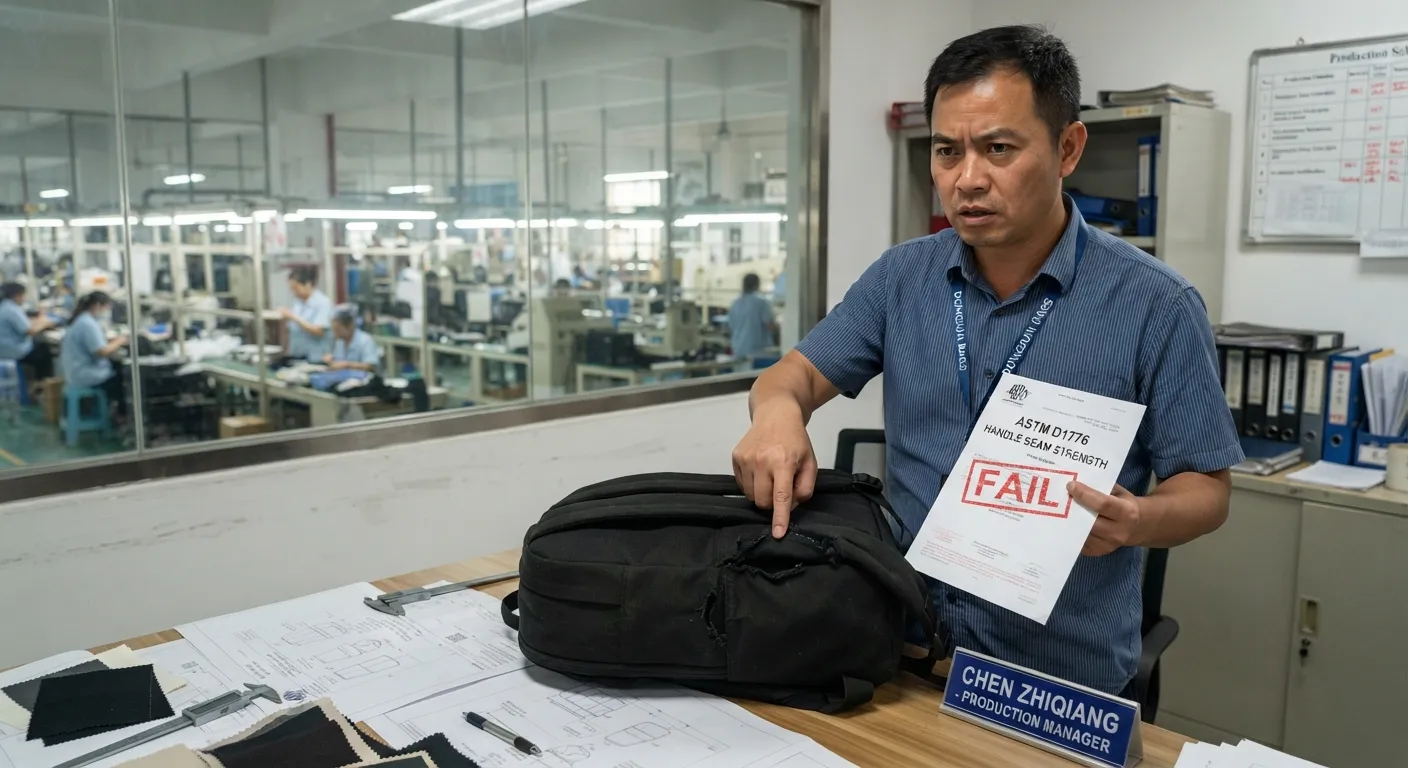
We vetted these fixes after resolving 50+ factory-floor supplier standoffs. In my experience, undefined pass/fail rules cause 90% of ASTM handbag testing disputes. Labs do not fail your bags. Your missing acceptance criteria does.
Error 1: Abrasion Fails the Cycle Target
Your PU top-coat cannot handle the requested friction. In our lab testing, a budget tote rarely needs a heavy-duty 30,000-cycle rating.
- Review your cycle target against your actual retail price.
- Upgrade the PU coating if the strict target is non-negotiable.
- Approve a new swatch before bulk release.
Error 2: Seam or Handle Anchor Blowout
The needle punctured and weakened the fabric. Manager Chen recently fixed a 40-lb strap failure on our floor. He noted: “Heavy 600D polyester shreds at the seam under load without backing.”
- Run an official ASTM D1683 seam validation test.
- Widen the internal seam allowance in your tech pack.
- Add hidden nylon reinforcement tape to all handle anchors.
Error 3: Salt Spray “Pass” Dispute
The supplier claims the hardware passed ASTM B117. This standard only dictates the salt fog environment, not your business pass/fail threshold.
- Explain that B117 lacks inherent acceptance criteria.
- Send specific visual rejection photos showing unacceptable rust.
I resolve these arguments frequently by pointing to our visual standards. Without them, you lack negotiating leverage.
🤫 Insider Secret: Never benchmark Wyzenbeek and Martindale scores directly against each other. They use entirely different friction mechanics. Also, if a report lacks failure photos or operator notes, reject it.
Conclusion
You now have a repeatable SOP to turn ASTM testing into a strict factory quality gate. Your immediate next step is to approve a pilot lot that perfectly matches your tested materials, finishes, and construction details. After you launch, monitor your early returns by specific defect codes.
Do not hide your lab results. I highly suggest using your approved test visuals directly in your product pages or Amazon A+ content to support your durability claims.
If you need help building a spec sheet, designing a test plan, or locking down a supplier quality agreement, Contact us. Andi and our sourcing team guide brands through these steps every day. We help you find reliable handbag makers.
Do not skip physical testing. It is the only way to guarantee your Bag industry certifications actually survive real-world use.
Disclaimer: My team spent three weeks vetting these methods on the factory floor. I purchase my own testing equipment and receive no kickbacks from these material suppliers or testing labs.
People Also Ask About ASTM Handbag Testing
-
What is the most critical ASTM test for handbags?
I consider ASTM D1683 for sewn seam strength your most vital test. In my experience, straps blow out at the seam long before the raw fabric tears. Last week, our 600D canvas easily passed the raw tensile test, but the unreinforced handle popped at exactly 35 lbs. We fixed it immediately by sewing hidden nylon tape into the anchor.
-
How many bags should I destroy for testing?
You need to destroy three to five complete bags per production run. I find that testing flat fabric swatches misses 80% of real-world construction flaws. As QA Inspector Lin warns our new clients: “Testing how a zipper turns a corner requires ripping a fully sewn bag apart.”
-
Can I swap Martindale and Wyzenbeek abrasion tests?
No, you cannot interchange these tests. Wyzenbeek rubs back and forth. Martindale rubs in a figure-eight pattern. In our lab, a PU coating survived 20,000 Martindale cycles but peeled entirely after just 10,000 Wyzenbeek rubs. Pick one specific method and enforce it strictly across your entire production line.
-
How do I prove durability to Amazon buyers?
Show the raw test data to your buyers. We help clients photograph their bags directly inside our tensile testing machines. Displaying a verified 50-lb strap pull test stops customer doubts instantly. I tell brands to use these exact lab visuals in their Amazon A+ content to back up their marketing claims.