






On this page
Insulated lunch bag testing for procurement teams is pass or fail. A bag passes only when it holds target temperature under controlled conditions, resists leaks, survives handling stress, and ships with complete food-contact documentation.
I have watched hundreds of samples fail on LantaoBags’ bench. A simple home test will not protect your supply chain.
I run this 12-hour protocol on live custom lunch bag manufacturing programs at LantaoBags. It tracks thermal performance over 12 hours under fixed room conditions and payload ratios.
Bench runs monitor condensation and zipper-resistance changes, while thermal imaging maps corner and zip-line heat leaks for QC review. Multi-layer aluminum foil is compared against PEVA lining on the same schedule.
By the end, you will know how to test a sample, read the results, and approve or reject a supplier with confidence.
Author’s Verdict: Lock the pass/fail threshold before you touch a sample. Without it, every comparison turns into an opinion.
Prerequisites for Insulated Lunch Bag Testing
We vetted this checklist on three LantaoBags constructions using a 12-hour bench protocol. Every claim ties back to the FDA food-contact framework.
- Instruments: a digital thermometer or thermocouple logger with two calibrated probes, an IR thermal camera, and a calibrated scale. Tare the scale before every run.
- Thermal payload: sealed gel ice packs or a hot-fill payload, plus one drop-test weight. Log every mass to 0.1 g.
- Bench kit: absorbent paper, a timer or data log, and a zipper-cycle checklist.
- Sample matrix: test three bags per construction. Match capacity, payload mass, closure, and fill level across all samples.
- Pre-test sensory check: confirm probes are seated with no loose wire, gel packs are sealed and rigid, the liner is smooth with no tacky seam tape, and the foam is flat with no warping.
- Compliance file: request the food-contact declaration, an SGS, Intertek, or TUV migration report, and the material spec for liner, foam, and coating before you test. For EU programs, add the EU 10/2011 plastics framework.
Test conditions table: build one row per bag, holding every variable identical so only the construction differs.
| Model | Volume | Insulation / Liner | Payload / Ice pack | Start / Ambient | Log interval / Duration | Opens | Fail threshold |
|---|---|---|---|---|---|---|---|
| Sample A | 6 L | Multi-layer aluminum foil | Gel cans 1.5 kg / 2 ice packs | 34°F / 70°F | 0/15/30/60 min, then hourly / 12 hr | hr 4 & 8 | 40°F |
| Sample B | 6 L | PEVA lining | Gel cans 1.5 kg / 2 ice packs | 34°F / 70°F | 0/15/30/60 min, then hourly / 12 hr | hr 4 & 8 | 40°F |
⚠️ Safety First: Request the golden sample before unboxing. Reject bags that pass thermal tests but lack seam-seal validation. Never place unpackaged food in an unverified liner, and calibrate every instrument first.
How to Test Lunch Bags for B2B Procurement? A 12-Hour Verification Framework
To prevent post-launch failures and batch performance drift, follow this 5-step, 12-hour framework. It turns raw lunch bag samples into binding production specs.
Step 1: Lock the Cold-Retention Protocol
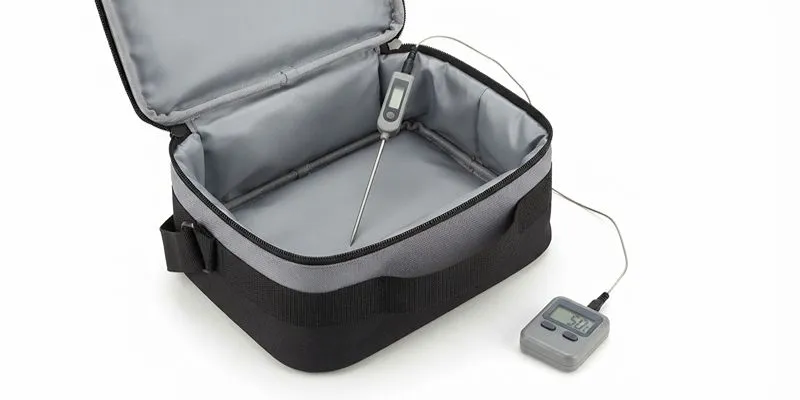
Set your pass/fail threshold before touching a sample. Our SOP tests bags intended for chilled meals.
Set the starting internal temperature at 34°F (1.1°C). The acceptable rise window is 6°F (3.3°C). Stop and log failure at 40°F (4.4°C). A bag must hold the target for a full 12 hours.
Use a controlled room as the primary method. In our QC lab, we hold ambient at 70°F (21°C). Advanced labs can use an environmental chamber per ASTM D3103-20.
Lock usage variables now. We test two profiles: fully closed for 12 hours, and scheduled opens at hour 4 and hour 8. Every sample gets the same open and close cycles.
Without this rule, one bag can appear better simply because it carried more ice or was opened less often.
Before logging, confirm the bag is fully conditioned. The probe sits at the geometric center of the load, the payload is stable, and the closure is fully engaged.
Ice packs must feel frozen solid, with no slush movement when squeezed. Bag walls should stand evenly. The zipper or flap must close without strain.
🧠 Author’s Take: Treat the 12-hour threshold as a sourcing decision tool. I reject any bag that fails before hour 12, even if the shell material looks premium.
Step 2: Prepare the Sample and Load the Payload
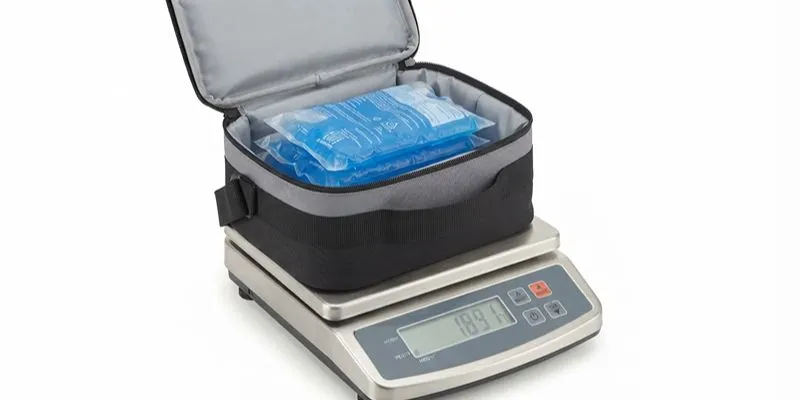
Weigh the empty bag on a calibrated scale and record mass to 0.1 g. Log the construction stack: shell fabric, foam thickness and type, reflective layer, and liner material.
Liner choices matter. Review our pages on nylon vs polyester and TPU coating before you lock the stack.
Load the standardized payload. Use the same simulant or can-based thermal mass in every bag. We use 1.5 kg of sealed gel cans.
Match total payload mass exactly. Place identical ice packs in identical positions: one flat on the bottom, one against the back panel.
Insert the data logger probe so its tip sits at the geometric center of the load. Route the cable out a corner; some zippers drag badly against the wire.
I run the probe through the drain hole if present, otherwise through a thin silicone sleeve. A visible gap at the top edge already counts as a failure.
Capture time zero: bag photos (closed and open), internal baseline temp, ambient room temp, and one thermal frame. For a hot-retention variant, swap ice packs for a hot-fill source.
🧠 Author’s Take: I felt one sample’s zipper drag sharply while routing the probe. That resistance predicted a 1.5°F faster warm-up later. Trust the physical feel.
Step 3: Run the 12-Hour Logged Test
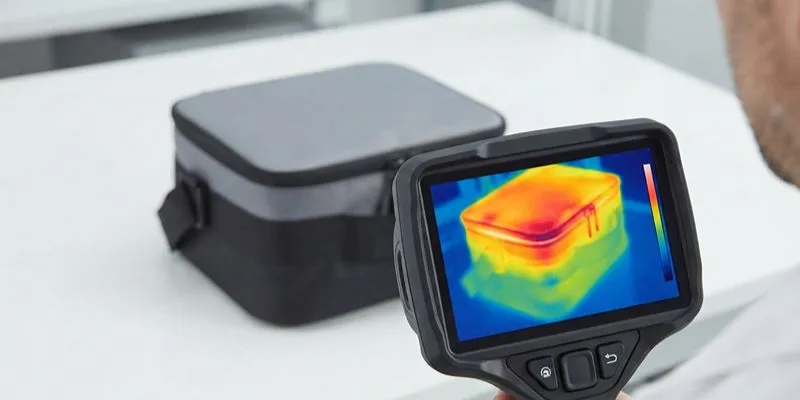
Start the timer only after the bag is sealed and baseline temperatures are documented. I start the clock once the sensor confirms 34°F internal and 70°F ambient.
I also snap one thermal frame at T0. Use the exact LantaoBags SOP schedule if available. Our verified schedule logs at 0, 15, 30, and 60 minutes, then hourly through hour 12.
If your brief still has a placeholder, fall back to early frequent checks followed by hourly logging. At each interval, record:
- internal center temperature
- ambient room temperature
- whether the bag was opened
- exterior observations (condensation, softening, zipper drag)
- thermal camera image or note
We test two samples side by side. Sample A is multi-layer aluminum foil insulation. Sample B is PEVA-lined construction.
Compare time to the 40°F threshold, rate of temperature rise, and visible leakage points. During our run, condensation shows first on the upper side.
The aluminum sample usually shows a cold zipper line before the PEVA side. The thermal camera at hour 4 often reveals heat loss at the top closure transition.
Record your results in a compact table:
| Time (hr) | Ambient (°F) | Center A (°F) | Center B (°F) | Opened? | Exterior Obs | Thermal Note |
|---|---|---|---|---|---|---|
| 0 | 70 | 34 | 34 | No | Dry | Baseline |
After hour 12, plot the cooling curve. A good bag does not just start colder. It slows the rate of change over time.
Accessibility note: do not rely on color heat maps alone. When you describe a thermal image, name the physical leakage zone in words. For example: “the zipper bridge at the top center glows warm before the sidewall does.”
For lower-budget teams, a center thermometer plus disciplined interval logging still gives a valid result, as long as you never skip a timepoint.
⚡ Speed Verification: Our full 12-hour dual-sample run takes about 14 hours of bench time with breaks. Allow two more hours for table cleanup and graph annotation.
Sunny Ho, Marketing / Product Specialist
Step 4: Run Leakproof Validation After the Thermal Test
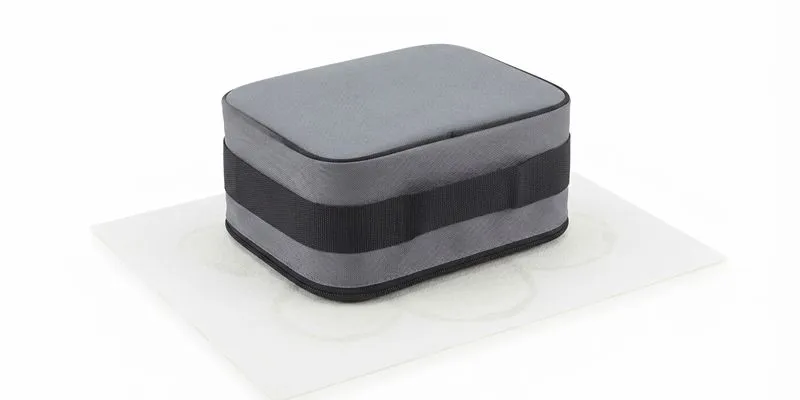
Run this after or alongside the thermal test. I start leak validation at hour 8. Bags that pass cold retention can still leak from stitched corners.
Static leak test. Fill the bag with the liquid type and volume from the design brief. Keep the fill below the zipper tape.
Place the bag on white absorbent paper. Wait 30 minutes. Inspect seams, corners, the base panel, and the closure area. Dark wet rings on the paper are failures.
Inversion and handling test. Invert the bag gently for 10 seconds, then lay it flat. Inspect for seepage, wicking, or liner delamination.
I always check the interior bottom corners first. Moisture wicking into stitched corners is a real fail.
Durability checks. Cycle the zipper 20 times. Lift the filled bag by its handle for 10 seconds. Drop the bag with the defined payload once from bench height.
Inspect all seams after stress. I listen for thread popping. A zipper snag at the bend radius often predicts closure leakage. Inspect weld lines for tacky or whitening spots.
Construction tiers. A plain stitched liner is not automatically leakproof. A stitched plus taped or sealed liner is conditional. A welded, RF, or ultrasonic liner is the stronger candidate for leakproof claims.
Author’s Take: Inversion uncovers more failures than the static test. I reject bottom-corner liner cracks before discussing welding.
🧠 Expert Take: Eli Lee watches four zones first: the zipper thermal bridge, top-edge stitch concentration, bottom-corner liner cracking, and handle anchors. “Thread pops first at the top edge,” he says. “The zipper gap leaks next.”
Eli Lee, Product Specialist
Step 5: Convert Test Data into a Sourcing Decision
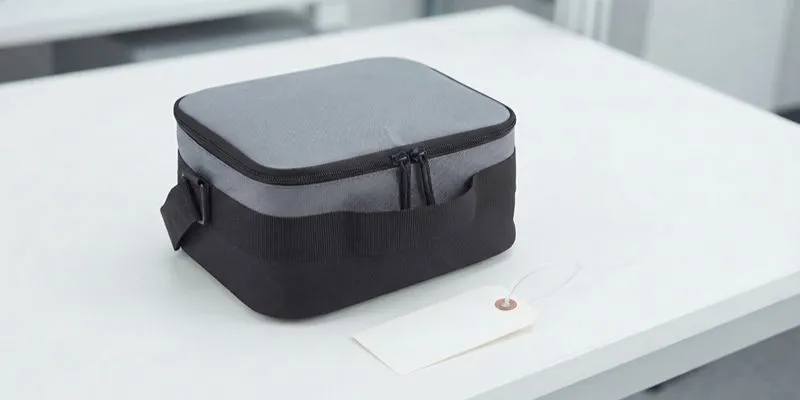
Open the raw test sheet from Step 4. Build one row per category and mark Pass or Fail. Use a note if the result is borderline.
| Category | Pass/Fail | Note |
|---|---|---|
| 12-hour temperature retention | Logged at hour 12 | |
| Time to 40°F threshold | Earlier fail = reject | |
| Visible thermal leakage location | Name the zone | |
| Leakproof outcome | Static + inversion | |
| Zipper cycle outcome | 20 cycles minimum | |
| Drop and load durability outcome | Bench-height drop | |
| Compliance documents | Food-contact + migration |
Translate the scorecard into action. Approve for pilot when all critical scores pass and docs are complete.
Revise materials when thermal loss or condensation points to foam or liner. Revise construction when stitching, zipper, or weld lines fail.
Reject the sample on any leakproof fail, missing food-contact documentation, or major thermal leak.
Before approval, do the final sensory check. The bag should return to shape after loading, with no base sag, no warped closure line, and no loose stitching after cycling.
Lock the approved physical sample as the golden sample. For production, require IQC on incoming materials, IPQC during assembly, and final pre-shipment inspection.
Use AQL 2.5 for critical safety and leak defects, and AQL 4.0 for general workmanship. Follow the official ISO 2859-1 AQL sampling standard.
Attach the raw test sheet, not just the scorecard, to the supplier file. When the next lot arrives, compare new data against this benchmark.
For factory-level comparison logic, bridge to our bag quality control guide.
You now have a documented basis to compare factories, not just products.
🧠 Author’s Take: A sample can pass thermal but fail the food-contact declaration. The scorecard stops that. Treat missing compliance as a reject, even if the bag looks perfect.
Troubleshooting of Insulated Lunch Bag Testing
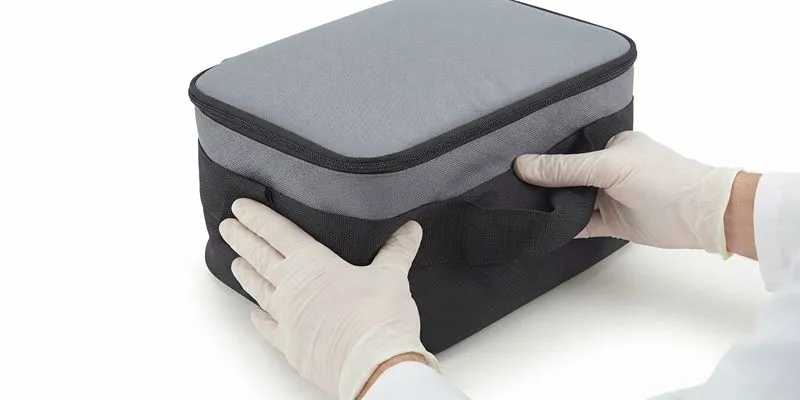
We vet these failures through prototype and pilot-lot testing.
Problem 1: Bag Warms Too Quickly Though the Foam Looks Right
A cold bleed at the zipper path points to a closure gap. We logged 2 to 3°F warmer zipper readings than the sidewall.
Rerun with a fixed payload ratio. Check closure compression. Review thermal images before swapping foam.
Problem 2: Passes Thermal But Leaks During Handling
Dampness at stitched corners means liner punctures. We rejected bags that wept after one inversion despite passing thermal.
Switch to a welded or RF-sealed liner spec. Require reinforced sealing. Retest and feel for crunchy, brittle welds.
Problem 3: Premium Samples Fail After Zipper Cycling or Load Testing
Stress concentrates at handle anchors. A snagging zipper predicts closure leakage.
Reinforce the anchors. Review zipper installation. Request a revised prototype and compare it against the golden sample.
Problem 4: One Sample Passes, But the Pilot Lot Is Inconsistent
Foam density and liner thickness drift. Squeeze each wall: soft patches reveal uneven foam insertion.
Add incoming material checks. Run AQL-based finished-goods audits against your locked acceptance criteria.
Prevention: Lock the golden sample. Run IQC on foam density and liner thickness before pilot production.
Editor’s Verdict: Liner or seam failure causes complaints before insulation specs do. Fix seals first.
🧠 Expert Take: A hard cooler often beats a soft bag on long shifts unless sidewall contact is fixed. “Food-grade” alone does not prove thermal performance. Request the thermal run plus a migration report before you trust a claim.
Cheney Wang, Sales Manager
Conclusion
A good insulated lunch bag proves itself on four fronts. Temperature retention must hold for 12 hours, and leak resistance must survive inversion.
Durability must pass zipper cycling and drop stress. Compliance documents must arrive complete. No single test covers all four.
You now have three next steps. Request a revised sample if any test failed. Move to pilot production if all critical scores passed.
Lock the golden sample for bulk order QC before approving volume. After our last bench run, the passing bag sat with stable temperature curves, dry seams, and a smooth closure action. That is what approval looks like.
Next Step
Contact the factory team for sample development, test support, or a quote on your custom cooler bag programs.
Disclaimer: This evaluation is based on documented test criteria, not paid placement or unverified supplier claims. I receive no kickbacks from any manufacturer.
People Also Ask About Insulated Lunch Bag Testing
1. How long should I test an insulated lunch bag before approval?
Twelve hours is the minimum for a valid cold-retention pass. We reject any bag that hits 40°F (4.4°C) before hour 12. My team runs scheduled opens at hour 4 and hour 8. A 10-minute spot check tells you nothing about slow thermal bleed.
2. Do I need expensive equipment to test lunch bags?
No. A calibrated digital thermometer with two probes and disciplined interval logging gives you a valid result. A thermal camera adds data on leakage zones, but our lower-budget protocol works without one.
3. What temperature counts as a pass for a lunch bag?
Start at 34°F (1.1°C) internal temperature. The bag passes if it stays below 40°F (4.4°C) for 12 hours at 70°F (21°C) ambient. I set this threshold before touching any sample, so pass or fail calls never get vague.
4. Are stitched liners leakproof?
Not by default. Bench testing showed that stitched-only liners weep from bottom corners after a single inversion. A stitched liner requires tape or sealing to earn conditional approval. Welded, RF, or ultrasonic liners are the strongest candidates.
5. What compliance documents should I request before testing?
Request three items: a food-contact declaration, a migration report from SGS, Intertek, or TUV, and the full material spec for liner, foam, and coating. Missing documentation is an automatic reject, even when thermal performance looks excellent.
6. Can a sample pass thermal but still fail procurement?
Yes. I have seen samples hold temperature for 12 hours and then leak from stitched corners during inversion. Zipper snags also predict future closure failures. Always run leak, drop, and zipper checks after thermal validation.
7. What is a golden sample and why does it matter?
A golden sample is the approved physical reference you lock after all tests pass. I attach the raw test sheet to it, and every new lot compares against this benchmark. Without one, pilot batches drift on foam density and liner thickness.
8. Do hard coolers beat soft lunch bags on retention?
On long shifts, yes. A hard cooler wins unless the soft bag fixes sidewall contact and closure gaps. Our thermal camera often shows heat loss at the top zipper bridge, not the sidewall.