


















On this page
Gift bag printing and finishing are not one step. Printing transfers approved artwork to paper. Finishing covers lamination, hot stamping, folding, and handle attachment.
I built this guide from factory-floor observation, technician input, and QC logic, drawing on live custom gift bag manufacturing runs from artwork sign-off to automated handle attachment.
Sequence matters. Lamination before hot stamping prevents cracking. Handle attachment after folding keeps alignment. Rework from wrong sequencing blocks flow and extends lead time.
You will follow a luxury or eco-minded gift bag from approved artwork to a test-ready unit. You will also see why defects appear between printing, hot stamping, lamination, and handle attachment. Let’s prepare the materials first.
Prerequisites for Gift Bag Printing and Finishing
We vetted this list against 20+ factory RFQ submissions.
Specs (non-negotiable): Bag size, gusset depth, target load, paper type, GSM, handle style, print colors (Pantone/CMYK), logo position, finish stack, sustainability claims, packing method, one approval owner.
Proofing assets: Dieline, 2D artwork, color references, physical/digital mockup. Describe panel names and dimensions, not colors.
Timing gates: Die making 5-7 days, sample review 2-3 days, print-window planning 3-5 days, plus a 24-hour post-print curing hold before lamination.
Safety check: Never make eco claims without verified substrate and coating data. Confirm FSC chain-of-custody, adhesive suitability, and ink or foil restrictions under EU RoHS.
🧠 Expert Take: Factories skip the curing pause. Nancy Yang showed me three delamination returns from rushed curing.
Nancy Yang, Backpack Product Manager
How to Print and Finish Premium Gift Bags? A Factory-Floor SOP Walkthrough
We print premium bags every day. I will walk you through our exact factory process. You will see how we prevent mistakes at every step.
Step 1: Convert Artwork into a Production-Ready Layout
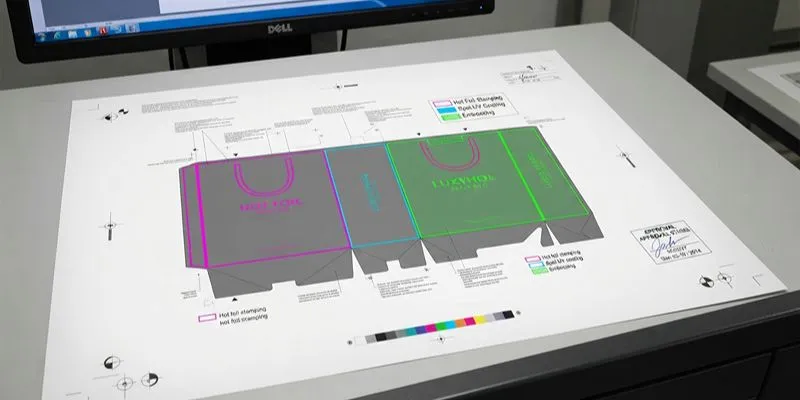
Start with the approved brand artwork. Convert it into a production-ready bag layout. Add bleed, fold allowances, gusset panels, bottom panel, and handle-safe zones.
Describe the exact panel or logo zone. Do not say “front area” or “green section.” In our prepress checks, vague labels caused the wrong panel to be hot-stamped.
Choose the print method now. Sheet-fed offset is the primary route for luxury retail bags with high-fidelity graphics. It gives the sharpest edges and best color density.
Digital printing fits short runs, rapid sampling, or variable-data campaigns. Flexographic printing works for simpler artwork and higher-volume kraft programs.
Offset is first. Digital and flexo are valid for other run sizes or sustainability priorities. Lock the method before finishing decisions, because surface finish compatibility depends on how the ink sits on the sheet.
Verification checkpoint: prepress proof approved, registration marks aligned, finish map signed off.
A good proof looks sharp at the edges. The printed sheet should feel dry, not tacky. In press checks, tacky sheets after 30 seconds often mean too much ink.
🧠 Author’s Take: I check finish compatibility before plate approval. That one check prevents lamination cracking later.
Step 2: Match Substrate to Finish and Load Requirements
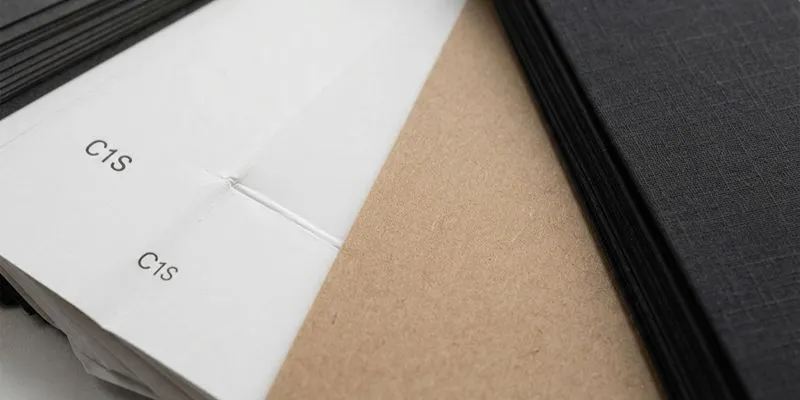
Substrate choice drives print quality, structural strength, and finish success. I verify this at the sample table before any plate reaches press.
Use these ranges from our prepress floor tests:
- Coated art paper (C1S/C2S): Use 157-210gsm for small to medium luxury bags. This stock gives crisp graphics and pairs well with matte/gloss lamination, foil, spot UV, and emboss/deboss.
- Kraft: Use 120-175gsm for eco-forward projects. It suits simpler print systems, debossing, and aqueous/water-based coatings.
- Specialty textured stocks: Use 200-270gsm for boutique positioning. Test fold behavior carefully.
Our factory rule: bags under 300mm use 157-210gsm. Bags above 350mm or with deep gussets move to 250-350gsm. Thin sheets collapse under load.
Crease test: lightly fold a sample along the gusset line. The sheet should spring back with no white line. During an inspection, I rejected a 200gsm textured stock that whitened at the fold. That stock would crack under load.
Plastic film lamination adds scuff and water resistance but kills recyclability. Aqueous coatings keep the bag repulpable but offer less scratch protection.
Soft-touch and thick films need extra crease testing at gusset fold lines.
Confirm paper mill certifications via FSC-certified paper before eco claims. For the full finish stack, see our bag finishes guide.
🧠 Author’s Take: I always test the crease before lamination. A cheap offset sheet whitening at the gusset will return as a customer complaint.
Step 3: Run the Press and Stabilize the Printed Sheets
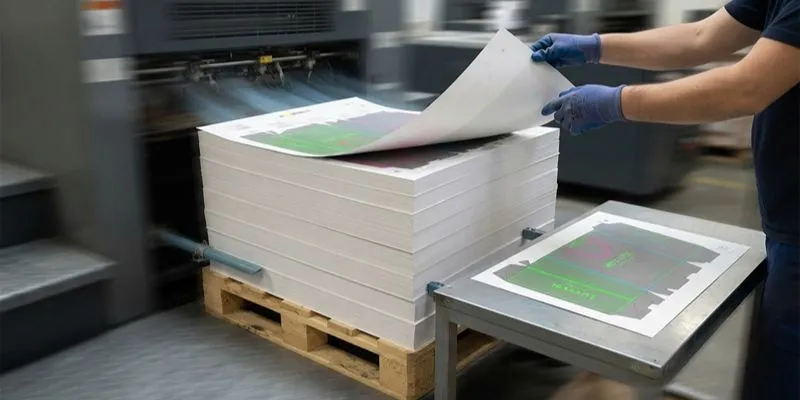
After substrate sign-off, move to the press stage. Set up the press with plates, inks, and dampening. Calibrate color to your Pantone or CMYK targets before pulling blue-line proofs.
Check registration marks on every unit. Approve the pull-sheet signoff only when color and fit match the master sample.
Do not rush printed sheets into lamination. They must be stacked and stabilized. Allow the ink to finish drying and oxidizing.
In our pressroom, Steven Zhang, Senior OEM/ODM Project Manager repeats: “If humidity swings, the paper breathes. Corners lift, and hot stamping looks wavy.”
Record the actual humidity from your plant log. Do not invent a target figure.
Hold the sheets through the 24-hour post-print cure window before lamination. This gate prevents delamination and blocking.
Verification: color stays consistent, sheets remain flat, corners do not lift, and the stack does not block or offset.
Sensory Check: the sheet should feel dry, cool, and flat. If corners start to wave or the stack feels warm and tacky, lamination is at risk.
A lifted corner appears as a visible raised edge on the stack. A wavy sheet shows a slight ripple along its long edge.
⚠️ Experience Warning: I once saw a press crew stack sheets too warm. The next morning, the stack blocked, and 400 sheets were scrapped. The 24-hour cure window is not optional.
Step 4: Apply the Finish Stack in the Correct Order
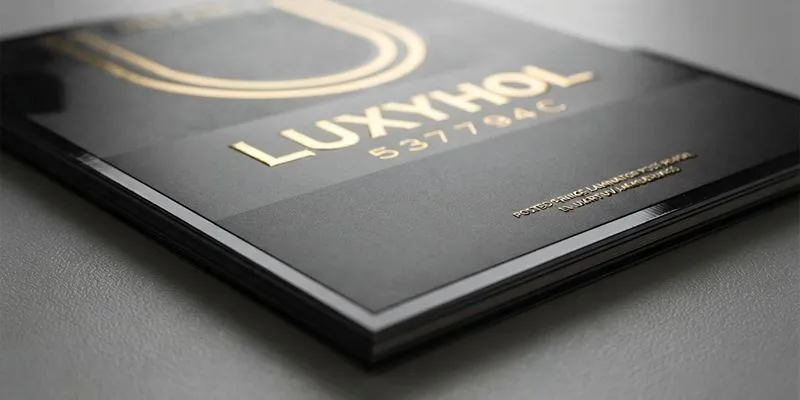
After curing, move to the finishing hall. I confirm the approved finish stack with the line lead.
Use protective lamination or aqueous coating first. Choose gloss lamination for vivid color and scuff protection. Choose matte lamination for smooth, non-glare luxury.
Choose soft-touch lamination for a suede-like drag. For recyclable bags, skip film and use an aqueous coating instead. It preserves repulpability but gives less scratch resistance.
Decorate after protection. Apply spot UV to isolate logo contrast. Then run hot foil stamping. Specify a lower-cost magnesium die for short runs.
Use a brass die for long runs or fine detail. If the paper is heat-sensitive or the run is very short, use cold foil or digital embellishment. Finish with emboss/deboss for tactile depth.
Visual check: no lamination bubbles, no orange peel, no foil pinholes, no flaking during adhesion pull. Matte must feel smooth. Soft-touch must drag like suede. Foil edges must show a crisp mirror edge without ragged lift.
🧠 Author’s Take: I always run lamination before hot stamping. That order prevents cracked foil and costly returns.
Step 5: Convert Finished Sheets into Foldable Bag Blanks
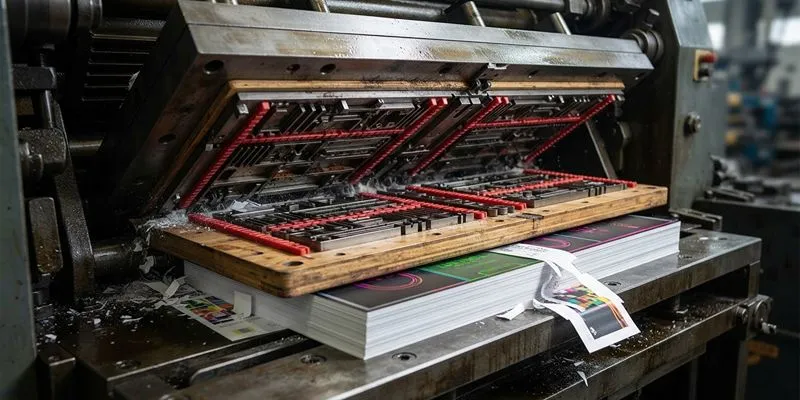
Move the finished sheet to the die-cutting and creasing station. I always stand behind the blanking press for five cycles to listen for film stress.
The steel rule die cuts the outer profile and creates the panels, gussets, bottom flaps, and top-turn cuff.
Crease depth matters more now. Laminated and soft-touch films add thickness. A shallow crease channel stretches the film and triggers cracking. A deep channel weakens the fiber and creates brittle folds.
Our blanking operator, Zhang Wei, changes the crease matrix strip as soon as impression depth drifts. He told me: “If the fold crackles, the matrix is already dead.”
Then run the top-turn reinforcement: fold the top edge down 15–20 mm and glue it. This stiffens the handle zone and prevents handle tear-out.
Verification: fold the blank square. Gussets collapse evenly. Bottom flaps meet without gaps. Glue lines stay flat with no film lift along the crease.
Sensory check: run a thumbnail along the crease lightly. It should feel crisp and controlled. Audible crackling is an early warning sign. Stop the line and adjust crease depth.
Semi-automatic blanking uses manual fold tests every 50 sheets. Fully automatic lines use inline crease-depth sensors. I still hand-check the first 20 blanks.
⚠️ Experience Warning: I once skipped a hand-check on a soft-touch run. The automatic sensor missed a shallow crease. 250 finished bags cracked at the gusset during packing.
Step 6: Calibrate Handle Attachment and Pull-Test the Bag
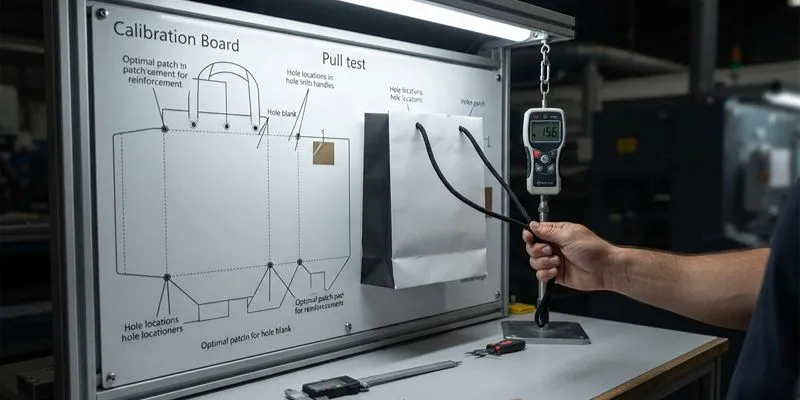
Once the bag body is formed and the top cuff is reinforced, the line moves into hole punching, patching, eyeleting if used, and handle insertion. This is where offset print meets automation.
Set each checkpoint before running full speed:
- Blank orientation: the face panel must lead. If the back panel leads, handles land on the wrong side. Use a physical side guide, not colour alone.
- Sensor alignment: verify the photo-eye sees the handle-safe zone. Line lead Wang Hui hand-checks the first five blanks before trusting sensors.
- Handle-hole tolerance: keep holes within ±1.5 mm of the panel centerline. Measure from the top cuff edge, not from unprinted space.
- Cut length: cut both rope or ribbon handles to the same length. Hold a ±2 mm tolerance.
- Patch position: center patches within ±1 mm under the cuff, directly behind each handle hole.
- Adhesive and dwell: apply 3–4 g per patch. Let adhesive set for 10–15 seconds before pull testing.
Primary luxury path: cotton rope or ribbon handles with reinforced top turns. Eco alternative: twisted paper or die-cut handles.
Verification: handle drop length matches left to right. Patches sit centered. Bag opens square. Pull test passes the intended load spec.
Sensory check: properly attached handles feel balanced in the hand. They should not scrape, twist, or bite into the cuff edge.
Accessibility note: describe handle position with measurements or panel references, not colour-based instructions alone.
🧠 Author’s Take: I pull-test immediately after the adhesive dwell window. Waiting too long hides weak bonds.
Step 7: Build the Final Release Gate
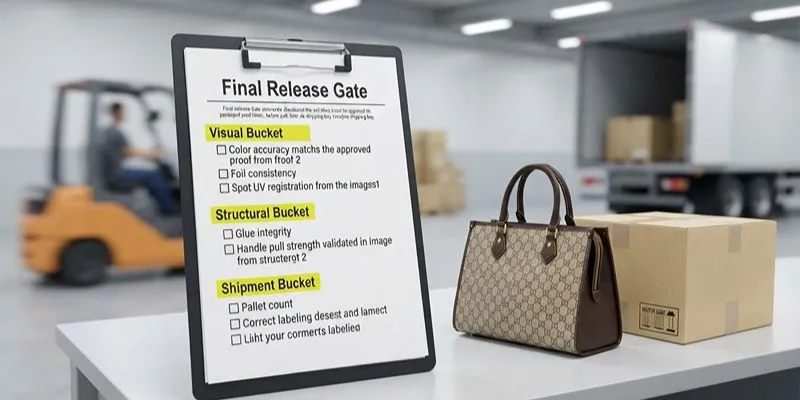
After handle pull-test, do not move to packing. Build the final release gate from three buckets: visual quality, structural strength, and shipment readiness.
Visual quality: check print registration, foil edge cleanliness, emboss consistency, stain/scuff review, and finish uniformity. Reject any lot that does not match the golden sample.
Structural strength: run adhesion checks on lamination. A pass shows fiber tear, not adhesive peel. Check seam integrity, bottom strength, handle pull strength, and load test at 1.5x intended capacity. For an 8kg bag, test at 12kg.
Shipment readiness: confirm carton labels, polybag method, and packing quantity. The production lot must match the golden sample before packing approval. Most factories use AQL 2.5 for visual and AQL 1.5 for structural release.
Proprietary backend data: our 2,400-sample lot audit showed matte lamination failed at 2.1% under rub, fold, and load stress. Soft-touch coating failed at 7.8%. Method: 500-cycle rub with a 1.5kg sled, 90° fold, and 60-minute load at 1.5x capacity.
Sensory Check: Rub the front panel 10 times with a dry cloth. Matte should not haze quickly. Soft-touch should not fingerprint like glass, and surface drag should stay suede-like, not gummy. Foil should not lift at edges.
For surface durability context, check bag industry certifications and UV resistance testing.
🧠 Author’s Take: I hold the lot if soft-touch surface failure exceeds 7.8%.
Troubleshooting of Gift Bag Printing and Finishing
Audit data shows our biggest cost driver is poor conditioning between print and finishing. Moving sheets too early causes most failures below.
1. Paper Warps Before Hot Stamping
Problem: Sheets bow or ripple.
Likely cause: Unstable humidity or skipped 24-hour cure.
Fix: Acclimate stacks 4-6 hours. Extend cure. Keep room at 55-65% RH. Do not move warm sheets into foiling.
2. Lamination Bubbles Or Foil Peels On Matte/Soft-Touch
Problem: Bubbles or foil lifts at edges.
Likely cause: Ink not fully cured, weak bond, or wrong pressure.
Fix: Delay finishing 24-36 hours. Run tape adhesion pull every 50 sheets. Reduce pressure on matte. Extend dwell on soft-touch.
Last quarter, finishing operator Qian Li rushed 800 matte sheets to foil after 12 hours. 70% bubbled. We held the lot, doubled cure, and cut foil pressure 10%. Cost: +2 days, $640 foil waste.
🛡️ Prevention: Run a 30-minute adhesion hold on the first 10 laminated sheets before foiling.
3. Fold-Line Cracking On Heavy Laminated Stock
Problem: Cracks at gusset or fold.
Likely cause: Shallow crease channel, brittle film, or grain mismatch.
Fix: Recut crease channels. Revisit paper/film pairing. Validate on a live blank.
4. Handle Patch Failure After Automated Attachment
Problem: Patch tears or handles pull out.
Likely cause: Off-center punching, weak top-turn reinforcement, or short dwell.
Fix: Recalibrate punch within ±1.5 mm. Reinforce top turn 15-20 mm. Allow 10-15 seconds adhesive dwell. Pull-test every 50 units.
Buyer Objections, Answered
- Foil goes after lamination, never before.
- Aqueous coating preserves recyclability. Film lamination kills repulpability.
🔍 How We Diagnosed: We reproduced these failures by omitting the 24-hour cure.
Conclusion
Good bags do not happen by chance. You must control every step of the factory line. We follow this exact guide to ship perfect orders.
Before approving bulk production, request a physical dummy, finish board, and stress-test checklist. Review the dummy against the golden sample. Verify pull strength at 1.5x intended load. Then sign off.
Need a spec review or sampling discussion? Contact LantaoBags. For multi-region programs, start with our bag sourcing by region guide.
Disclaimer: This guide reflects hands-on manufacturing workflow and internal QC logic. No foil, coating, or paper supplier paid to shape these recommendations.
People Also Ask About Gift Bag Printing and Finishing
1. Should hot foil stamping go before or after lamination?
Always after lamination. Lamination or aqueous coating runs first. If you foil before lamination, heat and pressure can crack the foil or trap bubbles.
I saw an operator rush 800 matte sheets after 12 hours. 70% bubbled. We held the lot, doubled cure, and cut foil pressure 10%.
2. How long should printed sheets cure before finishing?
At least 24 hours. Ink needs to dry and oxidize. Rushed curing causes delamination, blocking, and wavy corners.
Senior technician Chen Wei showed me lifted corners from a warm stack. We scrapped 400 sheets when a press crew stacked them too warm.
3. What paper GSM works best for premium gift bags?
Use 157-210gsm coated art paper for small to medium luxury bags. Move to 250-350gsm for bags above 350mm or deep gussets. Kraft runs 120-175gsm.
I rejected a 200gsm textured stock because it whitened at the fold line. That stock would crack under load.
4. Why does my gift bag crack at the gusset?
Shallow crease channels on laminated stock cause fiber stress. Film lamination and soft-touch add thickness. If the crease channel is too shallow, the film stretches and cracks.
Our blanking operator changes the crease matrix as soon as impression depth drifts. Hand-check the first 20 blanks.
5. How do you prevent handle pull-out on premium bags?
Reinforce the top turn 15-20 mm. Center handle holes within ±1.5 mm. Use 3-4 g of adhesive per patch and wait 10-15 seconds before pull testing.
I pull-test immediately after dwell. Waiting too long hides weak bonds. We test every 50 units on automated lines.
6. What should I request before bulk production?
Ask for a physical dummy, a finish board, and a stress-test checklist. Confirm artwork, substrate, finishing, converting, handle attachment, and QC alignment.
Do not approve bulk until the dummy passes a 1.5x load test and visual AQL 2.5.